Friday, 24 January 2025

Portable Woodworking Benches for Small Spaces

0 comments

Portable Woodworking Benches for Small Spaces: Your Guide to Compact Creativity

So, you're a woodworker with a passion for crafting, but your living space resembles a Tetris game more than a workshop? Don't despair! You don't need a sprawling garage to unleash your inner artisan. Portable woodworking benches are your secret weapon, offering the functionality of a full-sized workbench without the permanent footprint. Let's dive into the world of compact carpentry!

Choosing the Right Portable Bench for You

The beauty of portable benches is the variety. They come in all shapes, sizes, and materials, catering to various needs and budgets. Before you start browsing, ask yourself these crucial questions:

What Kind of Projects Will You Be Doing?

Are you tackling intricate miniature projects, or are you building larger items? The size and sturdiness of the bench will depend heavily on this. A delicate jewelry box requires a smaller, more stable surface than a sturdy garden bench. Consider the weight of your tools and materials â€" a flimsy bench won't hold up under heavy loads.

What's Your Budget?

Portable woodworking benches span a wide price range. You can find basic, foldable models for under $100, while more robust, feature-rich benches can cost several hundred dollars. Determine how much you're willing to invest, and remember that a higher price often reflects better quality, durability, and features.

How Much Space Do You Really Have?

Measure your space meticulously! Don't just consider the bench's dimensions when it's open; think about where you'll store it when it's folded or collapsed. Some benches fold flat, while others might require a bit more vertical space. Even the smallest bench takes up space, so plan accordingly.

What Materials Are Best?

Many portable benches are made from wood, metal, or a combination of both. Wood offers a classic aesthetic and often provides a comfortable working surface. However, it can be heavier and more susceptible to damage from moisture. Metal benches tend to be more durable and weather-resistant, but they can be less forgiving on your tools. Consider the pros and cons of each material.

Types of Portable Woodworking Benches

Let's explore some popular types:

Folding Workbenches

These are incredibly popular due to their space-saving design. They typically fold flat for easy storage, making them perfect for apartments or small workshops. They often feature a lightweight design, making them easy to move around. Look for models with sturdy locking mechanisms to ensure stability when in use.

Rolling Workbenches

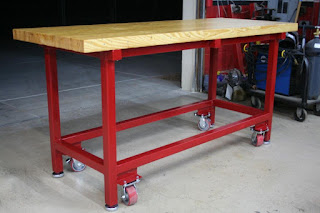
Equipped with wheels, these benches offer ultimate mobility. You can easily move them to different locations within your workspace or even outside for projects. Just make sure the wheels are sturdy enough to support the weight of the bench and your materials.

Wall-Mounted Workbenches

If floor space is at a premium, consider a wall-mounted workbench. These fold down when not in use, completely clearing your floor space. They are often smaller than other types, ideal for light projects. Ensure you have a sturdy wall to support the workbench.

DIY Portable Workbenches

Feeling crafty? You can build your own portable workbench tailored to your exact needs and preferences! Numerous online resources provide plans and tutorials for various designs. This option offers the greatest customization, but it requires woodworking skills and the time to complete the project.

Essential Features to Look For

Beyond the basic structure, several key features can enhance your woodworking experience:

  • Clamps: Integrated or easily attachable clamps are invaluable for securing your workpieces.
  • Vises: A vise provides a firm grip, essential for many woodworking tasks.
  • Storage: Built-in drawers, shelves, or compartments keep your tools organized and readily accessible.
  • Work Surface Material: Consider a durable, smooth work surface that’s easy to clean.
  • Height Adjustability: While not always available on portable models, adjustable height is a plus for ergonomic comfort.
  • Weight Capacity: Always check the manufacturer's specifications to ensure the bench can handle your projects' weight.

Maintaining Your Portable Workbench

A little care goes a long way in extending the life of your portable workbench. Regularly clean the work surface to remove sawdust and debris. If it's a wooden bench, occasionally apply a protective finish to prevent damage from moisture. Lubricate any moving parts, like hinges or wheels, to ensure smooth operation.

Frequently Asked Questions

Q: Are portable workbenches sturdy enough for serious woodworking?

A: It depends on the quality and design of the bench. While some are more suitable for smaller projects, many robust portable benches are capable of handling more demanding woodworking tasks. Look for ones with a high weight capacity and solid construction.

Q: How much space do I need to store a portable workbench?

A: This varies greatly depending on the type of bench. Folding benches often collapse flat, requiring minimal storage space, while others might need more vertical space.

Q: Can I use a portable workbench outdoors?

A: Some portable benches are more weather-resistant than others. If you plan to use it outdoors, choose a model made from weather-resistant materials, like treated wood or metal, and be mindful of protecting it from the elements.

Q: What's the best type of portable workbench for a beginner?

A: A simple, folding workbench is a great option for beginners. It's affordable, easy to store, and provides a good platform to learn the basics. As your skills and projects grow, you can upgrade to a more feature-rich model.

Choosing the right portable workbench is a significant step in creating a functional and enjoyable woodworking space, even in a small area. Take your time to consider your specific needs and budget, and enjoy the creative process!

Continue reading →

Pergola Plans for Patio Spaces with Vines and Greenery

0 comments

Dreamy Pergola Plans: Transform Your Patio with Vines and Greenery

Hey there, fellow patio enthusiasts! Let's talk about pergolas. Seriously, they're amazing. Imagine this: you're sipping your morning coffee, the sun gently warming your face, shaded by a lush, leafy pergola draped with climbing vines. Sounds idyllic, right? Well, it can be your reality! This guide is all about helping you plan and build the perfect pergola for your patio, transforming it into a verdant oasis.

Choosing the Perfect Pergola Design

Before you grab your tools, let's brainstorm the ideal pergola for your space. Think about these key factors:

Size and Placement:

First things first: how big is your patio? A massive pergola on a tiny patio will feel overwhelming, while a tiny pergola on a large patio will look lost. Measure your patio carefully and consider leaving enough space for comfortable movement and furniture placement. Think about the sun's path throughout the day â€" where will it be shaded? Do you want full shade, partial shade, or just a little dappled light?

Style and Material:

Pergolas come in all shapes and sizes! Do you prefer a classic, rustic design with rough-hewn wood? Or something sleek and modern with metal beams? Materials play a huge role in both the aesthetic and the longevity of your pergola. Wood offers warmth and a natural look, but requires regular maintenance. Metal is low-maintenance and durable but can be more expensive and might get scorching hot in direct sunlight. Vinyl is a popular choice for its durability and low maintenance needs, while offering a variety of colors and styles.

Roof Design:

The roof is a crucial design element. You've got options! A solid roof will offer complete shade and protection from rain, but it will also block out more light and airflow. A slatted roof allows for filtered sunlight and some airflow while still providing shade. Consider your climate â€" a slatted roof might be perfect for sunny areas with infrequent rain, while a solid roof would be better in an area with frequent showers.

Planning Your Pergola Project: A Step-by-Step Guide

Okay, you've got your dream pergola in mind. Now let's get down to the nitty-gritty of planning the construction.

1. Draw Detailed Plans:

Even a rough sketch is better than nothing! Jot down the dimensions, materials, and any special features you want to incorporate. If you're not confident in your drawing skills, consider using free online pergola design tools or consulting with a professional.

2. Obtain the Necessary Permits:

This is super important! Depending on your location and the size of your pergola, you might need a building permit. Check with your local authorities before you start building to avoid any legal hiccups.

3. Gather Your Materials:

Create a detailed materials list based on your plans. This will help you avoid last-minute trips to the hardware store and ensure you have everything you need. Remember to account for extra material in case of mistakes or unforeseen issues.

4. Prepare the Site:

Clear the area where your pergola will be built. Ensure the ground is level and stable. If necessary, you may need to dig holes for posts and pour concrete footings. Trust me, this step is crucial for a long-lasting pergola.

5. Build Your Pergola:

This is where the real work begins! Whether you're tackling this solo or with friends, make sure you follow your plans carefully and prioritize safety. If you're not comfortable with any aspect of the construction, don't hesitate to seek professional help.

6. Choose Your Vines and Plants:

This is the fun part! Research different climbing plants that are suitable for your climate and the amount of sun your pergola will receive. Popular choices include clematis, wisteria, jasmine, climbing roses, and honeysuckle. Consider the mature size of the plants to ensure they won't overwhelm your pergola.

Maintenance and Care for Your Pergola

Once your beautiful pergola is built, it's important to maintain it. This will extend its lifespan and keep it looking its best.

  • Regular Cleaning: Sweep or hose down your pergola periodically to remove dirt, leaves, and debris.
  • Wood Treatment: If your pergola is made of wood, apply a sealant or stain every few years to protect it from the elements.
  • Vine Trimming: Regularly prune your vines to keep them from becoming overgrown and damaging your pergola.
  • Pest Control: Monitor your vines for pests and diseases and take appropriate action as needed.

Frequently Asked Questions (FAQ)

Here are some common questions people have about building pergolas:

How much does it cost to build a pergola?

The cost of building a pergola varies greatly depending on the size, materials, and complexity of the design. A simple, DIY project might cost a few hundred dollars, while a custom-built pergola could cost several thousand.

How long does it take to build a pergola?

The construction time depends on the size and complexity of the project, as well as your experience level. A simple pergola could be built in a weekend, while a more elaborate one could take several weeks.

Do I need professional help?

While many people successfully build pergolas themselves, it's important to assess your own skills and comfort level. If you're unsure about any aspect of the construction, it's always best to hire a professional.

What kind of foundation do I need?

The type of foundation you need will depend on the size and weight of your pergola and your local soil conditions. For smaller pergolas, concrete footings might suffice. Larger pergolas may require more substantial foundations.

How do I choose the right vines?

Consider your climate, the amount of sunlight your pergola receives, and the mature size of the plants. Do your research and choose vines that are well-suited to your conditions. Your local nursery can provide excellent advice!

Building a pergola is a rewarding project that can transform your patio into a stunning outdoor space. With careful planning and a little elbow grease, you can create a beautiful and functional addition to your home that you'll enjoy for years to come. Happy building!

Continue reading →

Eco-Friendly Wooden Tables Made from Sustainable Materials

0 comments

Eco-Friendly Wooden Tables: Bringing Nature Indoors, Responsibly

Hey everyone! So you're looking for a new table, huh? That's awesome! But maybe you're also thinking about the planet, and wanting something that’s not only beautiful and functional, but also kind to Mother Earth. You're in the right place! Let's dive into the wonderful world of eco-friendly wooden tables made from sustainable materials. We'll talk about everything from the wood itself to the finishes used, so you can feel good about your purchase â€" and your impact on the environment.

Why Choose an Eco-Friendly Wooden Table?

Okay, let's be honest, there are tons of tables out there. Why should you choose one that’s specifically eco-friendly? Well, for starters, it's a statement. It shows you care about the planet and are willing to make conscious choices to minimize your environmental footprint. But it's more than just a feel-good purchase. It actually makes a real difference.

The Environmental Impact of Traditional Furniture

Think about where most furniture comes from. A lot of it involves logging practices that can be damaging to forests, using unsustainable wood species that are being harvested faster than they can replenish themselves. Then there are the harmful chemicals used in manufacturing processes and finishes â€" things that can end up polluting the air and water. It's not a pretty picture, right?

The Benefits of Sustainable Choices

On the other hand, choosing an eco-friendly wooden table supports responsible forestry. This means forests are managed in a way that allows them to thrive and continue providing us with wood and all the other amazing benefits of healthy ecosystems. It often involves replanting trees, protecting biodiversity, and minimizing the impact on the surrounding environment. Plus, eco-friendly tables often utilize less harmful, or even non-toxic finishes, keeping your home and the planet healthier.

Understanding Sustainable Wood Sources

Now, let's talk about the wood itself. There’s a huge difference between sustainably sourced wood and, well, anything else. It's not just about the type of tree, but the entire process from harvest to your home.

Certified Wood: The Gold Standard

Look for certifications like the Forest Stewardship Council (FSC) label. This means the wood comes from forests managed according to strict environmental and social standards. FSC certification ensures that the logging practices are sustainable, protecting biodiversity and the health of the forest ecosystem. It’s like a seal of approval, telling you that you’re buying a genuinely responsible product.

Reclaimed and Recycled Wood: A Second Life for Timber

Another fantastic option is furniture made from reclaimed or recycled wood. This is wood that’s been salvaged from old buildings, demolition sites, or even pallets. Giving this wood a new life reduces the demand for newly harvested timber, diverting waste from landfills, and often resulting in uniquely beautiful pieces with character and history. Imagine the stories that old barn wood could tell!

Fast-Growing and Locally Sourced Wood

Some eco-friendly tables are made from fast-growing wood species like bamboo or poplar. These trees mature quickly, making them a more renewable resource compared to slower-growing hardwoods. Choosing locally sourced wood also minimizes transportation emissions, reducing the carbon footprint of your table.

Beyond the Wood: Eco-Friendly Finishes and Construction

The wood is only part of the equation. The finishes and construction methods used also play a vital role in a table's eco-friendliness. Let’s delve into this too!

Non-Toxic Finishes: Protecting Your Health and the Planet

Many traditional wood finishes contain volatile organic compounds (VOCs), which can release harmful fumes into your home and pollute the environment. Look for tables finished with non-toxic, water-based, or plant-based alternatives. These are just as effective at protecting the wood, but far kinder to your lungs and the planet.

Sustainable Adhesives and Hardware

Even the adhesives and hardware used in construction can impact the environment. Look for manufacturers who use low-VOC adhesives and hardware made from recycled or sustainably sourced materials. It's the little details that add up to make a big difference.

Durability and Longevity: Investing in the Long Term

Investing in a well-made, eco-friendly table is an investment in longevity. A high-quality, sustainably sourced table will last for decades, reducing the need to replace it and minimizing your long-term environmental impact. Plus, it’s a piece of furniture you’ll truly cherish!

Finding Your Perfect Eco-Friendly Wooden Table

Now that you’re armed with all this knowledge, where do you start your search? It’s easier than you think!

Online Retailers and Marketplaces

Many online retailers and marketplaces specialize in eco-friendly furniture. Use keywords like "FSC certified," "reclaimed wood," or "sustainable furniture" in your searches. Read reviews and check the seller's information to ensure they’re committed to ethical and sustainable practices.

Local Craftsmen and Furniture Makers

Consider supporting local artisans and furniture makers. They often work with sustainable materials and pride themselves on creating high-quality, long-lasting pieces. Plus, you get to support your local economy!

Antique and Vintage Shops

Don't overlook the charm of antique and vintage shops. You might find a beautiful, pre-loved wooden table that’s already stood the test of time. Giving a piece a new home is a supremely sustainable choice!

Commonly Asked Questions

Here are some common questions about eco-friendly wooden tables:

  • Q: Are eco-friendly tables more expensive? A: Sometimes, yes. Sustainable materials and ethical manufacturing practices can come at a slightly higher cost. However, the longevity and environmental benefits often outweigh the initial investment.
  • Q: How can I care for my eco-friendly wooden table? A: This depends on the type of wood and finish. Generally, regular dusting and occasional cleaning with a damp cloth will suffice. Avoid harsh chemicals and abrasive cleaners.
  • Q: Where can I find certifications to verify the sustainability claims? A: Look for labels like the FSC logo, or check the manufacturer's website for information about their sourcing and manufacturing processes.
  • Q: Are all hardwoods unsustainable? A: No! Many hardwood species can be sustainably harvested if managed responsibly. Look for certifications and responsible sourcing information.
  • Q: What about the transportation impact? A: Choosing locally sourced wood significantly reduces the transportation footprint of your table. If you can't source locally, try to find manufacturers who prioritize efficient and environmentally friendly shipping methods.

Choosing an eco-friendly wooden table is a thoughtful decision that benefits both your home and the planet. It’s a statement of values, a commitment to sustainability, and a chance to bring a beautiful, responsibly made piece of furniture into your life. Happy shopping!

Continue reading →

Plans for a Folding Picnic Table for Convenient Storage

0 comments

Design Your Dream Folding Picnic Table: A Guide to Convenient Outdoor Dining

Tired of bulky picnic tables hogging valuable space in your garage or shed? Imagine a sleek, sturdy table that effortlessly folds away when not in use, leaving you with ample room for other activities. This guide provides a detailed blueprint for building your own custom folding picnic table, blending practicality with aesthetic appeal. We’ll walk you through the design process, material selection, and construction techniques, ensuring you end up with a piece you’ll cherish for years to come. Prepare to transform your outdoor entertaining!

Planning Your Perfect Folding Picnic Table

Before you even touch a saw, careful planning is crucial. Consider these key aspects:

Determining Size and Dimensions

The table's dimensions depend entirely on your needs and available space. Measure the area where you intend to use the table to determine the maximum size. Sketch a simple design, noting the desired length, width, and height of the table when both open and folded. Remember to factor in the thickness of the materials you choose for both the tabletop and supporting frame. Standard picnic table heights typically range from 28 to 30 inches. A comfortable seating height is key for enjoyable outdoor meals.

Choosing the Right Materials

The choice of materials significantly impacts the table's durability, weight, and aesthetic. Pressure-treated lumber offers excellent resistance to rot and insects, making it an ideal choice for outdoor use. However, cedar or redwood provide a more natural look and are naturally resistant to decay. For the hinges and fasteners, opt for high-quality, weather-resistant options like stainless steel or galvanized steel to ensure longevity. Consider adding a waterproof sealant to further protect the wood from the elements.

Constructing Your Folding Picnic Table: A Step-by-Step Guide

With your plans finalized, it’s time to bring your vision to life. Follow these steps for a smooth and efficient build:

Building the Tabletop and Support Frame

Begin by cutting the lumber to your predetermined dimensions for the tabletop. Assemble the frame using strong, durable wood screws. Ensure the frame is square and sturdy. For added stability, consider reinforcing the corners with brackets. Next, construct the support frame, which will hold the tabletop when folded. This frame should be strong enough to support the weight of the tabletop without bending or flexing.

Incorporating the Folding Mechanism

This is where careful planning truly pays off. Choose robust hinges designed for heavy-duty use. Position these hinges strategically along the edges of the tabletop and support frame. Ensure they are securely attached using appropriate screws and any necessary reinforcing plates. Test the folding mechanism frequently during assembly to ensure smooth and effortless operation. A well-designed folding mechanism ensures ease of use and prevents accidental collapse.

Adding Finishing Touches

Once the table is fully assembled, sand all surfaces to remove any rough edges or splinters. Apply a weather-resistant sealant or stain to protect the wood and enhance its appearance. Consider adding features like cup holders or a built-in umbrella hole for added functionality. A final coat of varnish or polyurethane provides lasting protection and a polished finish.

Enjoying Your New Folding Picnic Table

Congratulations! You’ve successfully built a convenient and stylish folding picnic table. Enjoy countless hours of outdoor gatherings with family and friends, knowing you’ve created a piece that combines functionality with your personal touch. Remember to regularly maintain the table with occasional cleaning and reapplication of sealant to ensure its longevity. With proper care, your custom-built folding picnic table will become a treasured addition to your outdoor living space for years to come.

Continue reading →

Affordable Solid Wooden Tables for Small Apartments

0 comments

Affordable Solid Wooden Tables for Small Apartments

The allure of solid wood furniture is undeniable. Its inherent durability, timeless aesthetic, and potential for lasting value make it a desirable choice for any homeowner. However, the perception that solid wood furniture is prohibitively expensive often deters those with limited space and budget, particularly residents of small apartments. This article aims to dispel that myth, demonstrating that acquiring affordable, high-quality solid wooden tables for small apartments is entirely achievable with careful planning and strategic sourcing.

Understanding the Affordability Equation

The key to finding affordable solid wood tables lies in understanding the factors that influence price. While genuine solid wood inherently commands a higher cost than alternatives like particleboard or MDF, several strategies can mitigate expense.

Wood Species Selection

The type of wood significantly impacts the price. Exotic hardwoods like mahogany or cherry are considerably more expensive than domestically sourced woods such as pine, fir, or oak. Choosing less expensive wood species doesn't necessarily compromise quality. Pine, for instance, offers excellent durability and a charming rustic aesthetic, particularly suitable for a variety of interior design styles. Similarly, oak, while slightly more expensive than pine, offers exceptional strength and longevity, making it a worthwhile investment in the long run.

Table Size and Design

Smaller tables naturally cost less than larger ones. The amount of wood required directly correlates with the final price. Opting for a compact bistro table, a narrow console table, or a cleverly designed drop-leaf table is an excellent way to maximize space and minimize cost in a small apartment. Simple designs with minimal ornamentation also tend to be more affordable than elaborately carved or intricately detailed pieces. The manufacturing process is less complex, thus reducing labor costs and reflecting a lower overall price.

Construction and Finish

The construction method also influences the price. Tables constructed with simple joinery techniques (e.g., mortise and tenon, dowel joints) are generally more economical than those employing more complex joinery. Similarly, the finish applied to the table affects the cost. While a high-gloss polyurethane finish might be more expensive, a simpler oil or wax finish can offer a beautiful, natural look at a lower price point. Consider the level of craftsmanship required â€" a hand-finished table will naturally command a higher price than a machine-finished one.

Sourcing Affordable Solid Wood Tables

Finding affordable solid wood tables requires a proactive approach and a willingness to explore various avenues.

Online Marketplaces

Online marketplaces like eBay, Craigslist, and Facebook Marketplace can be treasure troves of affordable solid wood tables. Used furniture often offers significant cost savings compared to new pieces, and diligent searching can uncover hidden gems. Carefully inspect listings for details about the wood type, condition, and dimensions. Contact the seller with any questions before committing to a purchase. Remember to factor in potential shipping costs if purchasing from a distance.

Secondhand and Antique Stores

Brick-and-mortar secondhand stores and antique shops represent another excellent resource. These stores often carry a diverse range of furniture, including solid wood tables at significantly reduced prices. Take advantage of the opportunity to physically examine the tables, assessing their condition and sturdiness firsthand. Negotiating the price is often possible, particularly if you discover minor imperfections.

Local Furniture Makers and Craftspeople

Consider contacting local furniture makers and craftspeople. While custom-made pieces may seem expensive, they can sometimes offer unexpectedly affordable options, particularly if you choose a simpler design and readily available wood species. Many artisans are willing to work within a budget, creating a unique piece tailored to your specific needs and space constraints. This approach allows for personalized customization and support of local businesses.

Repurposing and DIY Projects

For the ambitious and creatively inclined, repurposing existing materials or undertaking a DIY project can be a cost-effective route. An old wooden door, reclaimed planks, or even pallets can be transformed into a unique and affordable solid wood table with some effort and skill. This approach demands time and resources, but it offers unparalleled satisfaction and the ability to create a truly one-of-a-kind piece.

Maintaining Your Solid Wood Table

Investing in a solid wood table, regardless of cost, requires proper maintenance to preserve its beauty and longevity.

Regular Cleaning

Regular dusting with a soft cloth prevents the accumulation of dirt and grime. For more significant spills or stains, use a slightly damp cloth and mild soap. Avoid harsh chemicals or abrasive cleaners that can damage the wood's finish.

Protecting the Surface

Using coasters and placemats protects the table's surface from scratches, heat damage, and spills. Regularly inspect the finish for any signs of wear and tear and apply a fresh coat of wax or oil as needed to maintain its protective layer.

Addressing Scratches and Dents

Minor scratches and dents can often be repaired with wood filler or touch-up stain. For more significant damage, it's advisable to consult a professional furniture repair specialist.

In conclusion, obtaining affordable solid wood tables for small apartments is achievable through careful consideration of wood species, table size, design, and sourcing strategies. By exploring online marketplaces, secondhand stores, local artisans, and even DIY options, individuals can furnish their apartments with durable, aesthetically pleasing, and cost-effective solid wood tables. With proper maintenance, these tables will serve as valuable and lasting additions to any home.

Continue reading →

Bird House Plans with Removable Roofs for Easy Cleaning

0 comments

Build a Birdhouse with a Removable Roof: Easy Cleaning & Happy Birds

Attract feathered friends to your garden with a delightful birdhouse, but don't forget the importance of regular cleaning! A build-it-yourself project with a removable roof provides easy access for cleaning, ensuring a healthy and happy home for your avian guests. This article guides you through building a birdhouse designed for effortless maintenance, combining functionality with aesthetic appeal. You'll discover how simple modifications can make a world of difference in birdhouse upkeep, preventing the spread of disease and promoting a thriving bird population.

Choosing Your Materials and Design

Select durable, weather-resistant materials to withstand the elements. Untreated cedar or redwood are excellent choices, naturally resisting rot and decay. Avoid using pressure-treated lumber, as the chemicals can harm birds. Consider the size and species of bird you wish to attract; research the appropriate dimensions for your chosen bird. For instance, a smaller house suits chickadees, while larger ones are ideal for bluebirds. Plan your design with a removable roof in mind. Think about using hinges or simple latches for secure yet easily accessible access.

Essential Tools for Construction

Before you begin, gather your essential tools. This includes a saw (hand saw or circular saw), a drill with various drill bits, sandpaper in different grits, measuring tape, wood glue, screws, and a level. Having all your tools ready will streamline the building process. Consider using clamps to hold pieces together while the glue dries for added stability and a clean join. Don’t forget safety glasses and a dust mask to protect yourself during the construction process.

Building the Birdhouse with Removable Roof

Start by cutting the wood according to your chosen plan, ensuring accurate measurements for a snug fit. Assemble the walls and floor of the birdhouse, using wood glue and screws for robust construction. For the roof, create two separate panels that slightly overhang the main structure. These will act as a protective shield against the elements and allow for easy lifting and removal. Instead of attaching the roof permanently, use hinges along one edge of each roof panel. This design allows you to simply lift the roof sections to access the interior.

Securing the Removable Roof

To make the roof easy to remove, use small, sturdy hinges. Position them at the back of the roof to allow the panels to lift upwards. You can add simple latches or small hooks to hold the roof in place when closed. The key is to find a balance between secure closure and effortless access. Remember, the easier it is to clean, the more frequently you'll maintain the birdhouse, promoting a healthy habitat for birds.

Installing and Maintaining Your Birdhouse

Mount your birdhouse in a safe and sheltered location, approximately 4-6 feet above the ground and away from predators. Ensure it's protected from direct sunlight and rain. Regular cleaning is crucial for a healthy bird habitat. Remove nesting materials and droppings at least once a year, ideally in the fall after the breeding season. With the removable roof, this task becomes simple and efficient. Clean the interior with a soft brush and mild soap solution, thoroughly rinsing before replacing the roof.

Providing a Safe and Clean Environment

By building a birdhouse with a removable roof, you're not only creating a beautiful addition to your garden, but also committing to providing a healthy and safe home for birds. Regular cleaning prevents the buildup of parasites and diseases that can harm birds and their young. A clean birdhouse promotes healthy nesting and successful breeding cycles, contributing to a thriving local bird population. This small act of dedication can greatly impact the natural world around you.

Enjoy watching your feathered friends thrive in their new, easily maintainable home!

Continue reading →

Best Picnic Table Plans for Large Family Gatherings

0 comments

Best Picnic Table Plans for Large Family Gatherings

Planning a large family gathering? A sturdy and spacious picnic table is essential for creating a memorable, comfortable, and enjoyable experience. Forget cramped seating arrangements and fighting for space; envision a gathering where everyone can relax, converse, and share delicious food together. This article explores several picnic table plans perfectly suited for accommodating your entire extended family, ensuring your next gathering is a resounding success.

Choosing the Right Size and Style

The first crucial step is determining the ideal size for your picnic table. Consider the average number of guests at your family gatherings. A simple calculation â€" allowing roughly 24-36 inches per person â€" will help you estimate the necessary table length. Don't underestimate the need for extra space; you'll want room for serving dishes, drinks, and perhaps even some games. Beyond size, think about the overall style. Do you envision a rustic, classic design, a modern and sleek look, or something more whimsical? This decision influences your choice of materials and construction techniques.

Considering Material Options:

The material you choose significantly impacts durability, aesthetics, and maintenance. Pressure-treated lumber offers excellent durability and weather resistance, making it a popular choice for outdoor furniture. However, it requires regular sealing to maintain its appearance. Cedar or redwood provide natural beauty and resistance to rot and insects but come with a higher price tag. For a truly lasting and low-maintenance option, consider concrete or metal, although these materials can become quite hot in direct sunlight.

Detailed Plans for Large Family Picnic Tables

Now, let's delve into specific plans catering to different needs and styles. Remember to always prioritize safety and structural integrity when constructing your picnic table. Use high-quality fasteners and follow the instructions carefully.

The Classic Rectangular Design:

This timeless design remains a favorite due to its simplicity and functionality. A standard rectangular table with benches attached on either side provides ample seating. For larger families, consider extending the length to accommodate everyone comfortably. You can build this using readily available lumber and simple joinery techniques. Numerous free online plans offer detailed instructions and diagrams, guiding you through each step of the process.

The Extended L-Shaped Design:

If space allows, an L-shaped table offers a fantastic solution for larger gatherings. The extra length and angle create multiple conversational areas, promoting interaction and preventing overcrowding around the main seating area. This design works exceptionally well in corner locations or near existing structures, maximizing available space. This plan requires more intricate cuts and joinery, but the resulting layout is well worth the effort.

The Multi-Sectioned Table:

For truly enormous family gatherings, a multi-sectioned picnic table might be the ultimate solution. This involves creating several smaller rectangular sections that can be connected or detached as needed. This offers incredible flexibility â€" you can easily adjust the size of your seating area to suit the number of guests present. While it's a more complex project, the modularity provides immense long-term value.

Adding Personal Touches

Once you've chosen and constructed your picnic table, don’t forget to personalize it! Adding a built-in umbrella hole offers shade on sunny days. Incorporating a built-in cooler can keep drinks cold. You could even add a decorative mosaic tile inlay or carve your family's initials into the wood for a unique keepsake. The possibilities are endless.

Building your own picnic table is a rewarding project that strengthens family bonds and provides a lasting legacy for years of joyful gatherings to come. Choose the plan that best suits your family's size and style, and get ready to create lasting memories around your custom-built picnic table!

Continue reading →

Budget-Friendly Picnic Table Plans for First-Time Builders

0 comments

Budget-Friendly Picnic Table Plans for First-Time Builders

Constructing a picnic table is a rewarding DIY project that enhances outdoor living spaces. This guide provides comprehensive plans for first-time builders aiming for a budget-friendly approach, emphasizing practicality and ease of construction. The plans detail material selection, step-by-step assembly, and cost-saving strategies. While experience with basic woodworking tools is helpful, this guide prioritizes clarity and simplicity, making it accessible to novices.

I. Material Selection and Cost Optimization

Choosing the right materials is crucial for achieving both durability and affordability. Pressure-treated lumber is a popular and economical choice for outdoor furniture due to its resistance to rot and insect damage. However, alternative options exist, each with its own pros and cons. This section will detail these choices and guide you toward making the most cost-effective selection.

A. Lumber Selection and Sourcing:

Pressure-Treated Lumber: This is the recommended material due to its inherent durability. Opt for standard 2x4s and 2x6s for the frame and seating. Avoid using recycled lumber unless you are certain of its structural integrity and treatment against rot and pests. Sourcing lumber from local lumberyards or salvage yards can significantly reduce costs compared to big-box stores. Negotiating prices, especially for bulk purchases, can also yield substantial savings.

Recycled Lumber: Using reclaimed or recycled lumber is an environmentally conscious and potentially cost-effective option. However, careful inspection is crucial to ensure the wood is sound and free from rot or insect infestation. Reclaimed wood may require additional treatment or finishing to ensure longevity.

Alternative Materials: While less common for picnic tables, composite lumber offers durability and low maintenance. However, it's typically more expensive than pressure-treated wood. Cedar or redwood are naturally rot-resistant but are considerably more expensive than pressure-treated lumber.

B. Hardware and Fasteners:

The cost of hardware can add up quickly. Choose economical but reliable options. Galvanized or stainless steel screws and bolts are essential for outdoor use to withstand the elements. Consider purchasing these items in bulk to leverage discounts. Using exterior-grade wood glue in conjunction with screws will strengthen the joints and ensure a longer-lasting structure.

C. Tools Required:

Investing in expensive power tools is unnecessary for this project. A basic set of tools will suffice. These include:

  • Measuring tape
  • Pencil
  • Saw (hand saw or circular saw)
  • Drill with drill bits
  • Screwdriver (Phillips and flathead)
  • Level
  • Safety glasses
  • Work gloves

Renting specific tools like a circular saw is a cost-effective alternative to purchasing if you don't anticipate using them frequently.

II. Picnic Table Design and Dimensions

This plan outlines a simple, rectangular picnic table. Adjustments to the dimensions are possible to fit your specific needs and space constraints. The design prioritizes straightforward construction techniques, minimizing complexity for first-time builders. Accurate measurements and precise cuts are crucial for a sturdy and aesthetically pleasing outcome.

A. Overall Dimensions:

The recommended dimensions are:

  • Tabletop Length: 72 inches (6 feet)
  • Tabletop Width: 36 inches (3 feet)
  • Tabletop Height: 30 inches
  • Seat Height: 18 inches
  • Seat Depth: 16 inches

These dimensions can be scaled up or down, but maintaining the proportions is essential for stability and comfort.

B. Cut List:

Based on the dimensions above, the following lumber cuts are needed:

  • Four 2x6s, 72 inches long (tabletop supports)
  • Two 2x6s, 36 inches long (tabletop supports)
  • Two 2x4s, 72 inches long (legs)
  • Two 2x4s, 30 inches long (legs)
  • Four 2x4s, 16 inches long (seat supports)
  • Eight 2x4s, 36 inches long (seat boards)

Note: These measurements are approximate and may need slight adjustments depending on the actual dimensions of your lumber after cutting.

III. Step-by-Step Construction

This section provides a detailed, step-by-step guide to building the picnic table. Each step is accompanied by clear instructions and images (which would be included in a visual guide). Remember to prioritize safety by wearing safety glasses and work gloves throughout the process.

A. Constructing the Tabletop Frame:

  1. Assemble the main frame using four 72-inch 2x6s and two 36-inch 2x6s. Secure the joints with screws and wood glue. Ensure the frame is square using a measuring tape and level.
  2. Attach the tabletop supports (2x6s) to the frame. Use screws and glue to create a strong bond.

B. Assembling the Legs:

  1. Attach the legs (2x4s) to the corners of the frame using screws and glue. Check for plumb (vertical alignment) with a level.
  2. Reinforce the legs with diagonal supports for extra stability (optional).

C. Attaching the Seats:

  1. Attach the seat supports (2x4s) to the legs at the desired height (18 inches from the ground). Ensure even spacing.
  2. Secure the seat boards (2x4s) to the supports, leaving a small gap between each board for expansion and contraction.

D. Finishing Touches:

  1. Sand all surfaces smooth to remove any splinters or rough edges.
  2. Apply a weather-resistant sealant or paint to protect the wood from the elements. Allow ample drying time before use.

IV. Cost Estimation and Saving Strategies

A detailed breakdown of the material costs is crucial for budgeting purposes. Prices can vary depending on location and lumber prices. This section offers strategies to further reduce costs while maintaining quality.

A. Material Cost Breakdown (Approximate):

(These prices are estimates and will vary based on location and supplier.)

  • Pressure-treated Lumber: $50 - $100
  • Screws and Bolts: $10 - $20
  • Wood Glue: $5 - $10
  • Sealant/Paint: $15 - $30

B. Cost-Saving Tips:

  • Purchase in bulk: Buying lumber in bulk often yields significant discounts.
  • Shop around: Compare prices from multiple lumberyards and home improvement stores.
  • Consider alternative materials: Explore reclaimed or recycled lumber options if available and suitable.
  • Utilize free or low-cost resources: Seek out free pallets or ask friends for scrap lumber.
  • DIY finishing: Applying sealant or paint yourself is cheaper than hiring a professional.

By carefully planning and employing these cost-saving measures, constructing a durable and aesthetically pleasing picnic table on a budget is entirely achievable. This detailed guide provides a solid foundation for first-time builders to embark on this rewarding project.

Continue reading →

Free Pergola Plans for a Simple and Elegant Look

0 comments

Free Pergola Plans for a Simple and Elegant Look: Build Your Dream Outdoor Oasis

Hey there, fellow DIY enthusiasts! Dreaming of a beautiful pergola to add some serious style and shade to your backyard? You've come to the right place. Building a pergola might seem daunting, but with the right plans and a little elbow grease, it's totally achievable. Forget expensive contractors and confusing instructions â€" I’m going to walk you through creating a simple, elegant pergola using free plans that are easy to follow, even for beginners.

Choosing Your Pergola Style: Simple Elegance is Key

Before we dive into the specifics, let's talk about style. We're aiming for simple elegance here, right? Think clean lines, natural materials, and a design that complements your existing outdoor space. Avoid overly ornate details â€" simplicity is key to a timeless look. We'll be focusing on a design that's easily adaptable to different sizes and materials, so you can customize it to perfectly fit your needs and taste.

Materials: Keeping it Natural and Beautiful

For a truly elegant pergola, I highly recommend using pressure-treated lumber. It's durable, weather-resistant, and relatively inexpensive. Cedar or redwood are fantastic options if you're looking for a more premium, naturally beautiful look, but they do come with a higher price tag. Regardless of your choice, make sure the wood is properly dried to prevent warping and cracking.

You'll also need standard construction fasteners like screws and possibly some exterior-grade wood glue for extra strength and longevity. Consider using galvanized or stainless steel hardware to prevent rust. Remember to always check your local building codes before starting your project!

Step-by-Step Pergola Plans: Let's Get Building!

Okay, let's get down to the nitty-gritty. These plans are for a 10ft x 10ft pergola, but you can easily adjust the dimensions to suit your space. Remember to always double-check your measurements before cutting any wood! Safety first!

Step 1: Laying the Foundation

This is crucial. You'll need four sturdy posts to support your pergola. Consider using 4x4 pressure-treated posts, buried at least 2-3 feet deep in concrete. Ensure the posts are perfectly plumb (vertical) using a level. This step ensures stability and longevity. You might want to add some gravel to the bottom of your holes for better drainage. Trust me, you'll thank yourself later.

Step 2: Constructing the Top Beams

Once the posts are set and the concrete has cured completely, it's time for the top beams. These run across the top of your posts, creating the main structure for your roof. We’ll use two 4x6 beams to span the width of the pergola. Secure them to the posts using galvanized screws and consider adding metal brackets for extra support.

Step 3: Adding the Rafters

Now for the rafters â€" these are the pieces that run from the top beams down to the posts, creating the lattice-like structure of your pergola. Space them evenly across the width of the pergola â€" around 2 feet apart works well. I personally prefer a slightly more spaced-out design for a less cluttered look. This is where you can personalize your pergola and play around with the spacing. You can use 2x4s or 2x6s for the rafters, depending on your preference and desired strength.

Step 4: Attaching the Lattice (Optional)

This is where you can add some personality. A lattice adds a beautiful, decorative touch, but it's entirely optional. You can create a simple lattice pattern using 1x2s or 1x3s, attaching them to the rafters with smaller screws. This is a great way to add a touch of elegance without making the structure too heavy.

Step 5: Finishing Touches

Once everything is securely fastened, sand all surfaces to smooth out any rough edges. Then, apply a high-quality exterior wood stain or sealant to protect your pergola from the elements and enhance its natural beauty. Choose a color that complements your house and landscaping. This step is vital for longevity.

Tips for a Stunning Result

Here are a few extra tips to help you create a truly elegant pergola:

  • Plan your layout carefully: Before you start building, sketch out your design and measure your space thoroughly.
  • Use high-quality materials: Investing in good lumber will make a big difference in the longevity and appearance of your pergola.
  • Take your time: Rushing the process can lead to mistakes. Work steadily and accurately.
  • Ask for help: Don't hesitate to ask friends or family for assistance, especially with lifting heavier pieces.
  • Enjoy the process: Building a pergola is a rewarding project. Take pride in your work and enjoy the beautiful results!

Commonly Asked Questions

Here are some questions I often get asked about pergola building:

Q: How much does it cost to build a pergola?

A: The cost varies greatly depending on the size, materials, and complexity of your design. A simple pergola like the one described above can cost anywhere from $300 to $1000, depending on material choices.

Q: How long does it take to build a pergola?

A: This depends on your experience and the complexity of the design. A simple pergola can be built in a weekend with two people, while more complex designs might take several days.

Q: Do I need a permit to build a pergola?

A: This depends on your local building codes and the size and complexity of your pergola. Check with your local authorities before starting your project.

Q: Can I add lighting or plants to my pergola?

A: Absolutely! Adding string lights, hanging plants, or climbing vines can really enhance the ambiance and beauty of your pergola. Get creative!

Q: What if my pergola starts to lean?

A: If you notice any leaning, address it immediately. This could be due to uneven settling of the posts. You may need to adjust the posts or add additional support.

I hope this guide helps you create the beautiful and functional outdoor space you’ve always dreamed of! Happy building!

Continue reading →

Rustic Bird House Plans for a Natural Look in Your Garden

0 comments

Rustic Bird House Plans for a Natural Look in Your Garden

Transform your garden into a haven for feathered friends with charming, rustic birdhouses that seamlessly blend with the natural surroundings. Forget the stark, manufactured look; these plans guide you toward creating bird homes that exude character and charm, attracting a variety of birds while adding a touch of rustic elegance to your outdoor space. Imagine the delightful sight of birds flitting around your handcrafted creations, a testament to your creativity and love for nature.

Choosing Your Rustic Materials

The key to a truly rustic birdhouse lies in the materials you choose. Forget perfectly smooth, treated lumber. Instead, embrace the beauty of natural imperfections. Reclaimed wood offers a unique character and a rich history; think weathered barn boards, old fence posts, or even fallen branches. The more weathered and textured, the better! If reclaimed wood isn't readily available, consider using untreated cedar or pine â€" these woods are naturally resistant to decay and are readily available at most home improvement stores. Remember to avoid using pressure-treated lumber, as the chemicals can be harmful to birds.

Essential Tools and Supplies:

Before you begin, gather your tools and materials. You'll need:

  • Reclaimed or untreated wood
  • Saw (hand saw or circular saw)
  • Drill with various drill bits
  • Screws (exterior-grade)
  • Hammer and nails (optional, for a more rustic look)
  • Sandpaper (various grits)
  • Exterior-grade wood glue
  • Measuring tape and pencil
  • Waterproof sealant (optional)

Building Your Rustic Birdhouse: Step-by-Step

Now for the fun part! These plans focus on a simple, classic design, easily adaptable to your own creative flair. We'll construct a charming A-frame birdhouse, perfect for smaller bird species. Begin by cutting your wood to the dimensions detailed in the plan below (adjust sizes based on your chosen bird species). Remember accuracy is important for a secure and weather-resistant structure. Use the wood glue and screws to assemble the sides, ensuring a snug fit and paying careful attention to square corners for stability.

Detailed Dimensions (adjust as needed):

  • Front and Back Panels: 6 inches wide x 8 inches high
  • Side Panels: 5 inches wide x 8 inches high
  • Roof: Two pieces, each 7 inches wide x 6 inches long
  • Floor: 6 inches wide x 5 inches deep
  • Entrance Hole: 1.5 inches in diameter

Once the main structure is complete, attach the roof securely using screws, allowing for a slight overhang to protect the interior from rain. Carefully drill the entrance hole, ensuring it's positioned slightly below the peak of the roof to further enhance weather protection. Sand down any rough edges and imperfections for a smooth finish. Optionally, apply a coat of waterproof sealant to protect the birdhouse from the elements, but ensure it's a bird-safe sealant.

Adding the Finishing Touches

The real magic happens when you add those final rustic touches! Consider leaving some natural wood texture visible for an authentic feel. A simple coat of clear wood sealer enhances the natural wood grain without obscuring its rustic charm. If you desire more color, use a natural earth tone stain that blends beautifully with your garden. You can even use reclaimed wood scraps to create a small perch just below the entrance hole. Lastly, select a suitable location in your garden; hang the birdhouse securely in a sheltered, shaded spot away from strong winds and predators.

Enjoy watching your handcrafted birdhouse become a lively hub of avian activity!

Continue reading →

Wooden Bird House Plans for Durable and Long-Lasting Structures

0 comments

Build a Birdhouse That'll Last: Durable & Long-lasting Wooden Birdhouse Plans

Hey there, fellow bird lovers! So you're thinking about building a birdhouse? That's fantastic! There's something incredibly rewarding about crafting a cozy home for your feathered friends. But let's be honest, you don't want to spend all that time and effort only to have your masterpiece fall apart after a season or two. That's where these plans come in â€" we're going to build a birdhouse that's not just cute, but seriously durable and built to last.

Choosing the Right Wood: The Foundation of Durability

The first step to a long-lasting birdhouse is choosing the right wood. Don't just grab whatever scrap lumber you have lying around! You want something that can withstand the elements â€" rain, snow, sun â€" and resist rot and insect damage.

Your Top Choices:

  • Cedar: This is a popular choice for birdhouses because it's naturally rot-resistant and smells amazing (birds probably appreciate that too!). It's also relatively easy to work with.
  • Redwood: Similar to cedar in its durability and resistance to rot and insects. It's a bit more expensive but offers superior weather protection.
  • Cypress: Another excellent choice for its natural resistance to rot and decay. It's a bit harder to work with than cedar or redwood but worth it for its longevity.
  • Pressure-Treated Pine: While not as aesthetically pleasing as the natural wood options, pressure-treated pine is incredibly durable and affordable. Important Note: Make sure the pressure-treated lumber you choose is specifically designed for above-ground use and is free of harmful chemicals that could affect birds.

Avoid using softwoods like untreated pine or fir, as they're prone to rot and insect damage. And absolutely stay away from plywood â€" it's not weather-resistant and will quickly deteriorate.

Design Considerations for Maximum Durability

Now that you've chosen your wood, let's talk design. A well-designed birdhouse is key to its longevity. Here's what to keep in mind:

Proper Ventilation:

Good ventilation is crucial to prevent moisture buildup inside the birdhouse, which can lead to mold and rot. Drill several small ventilation holes near the top of the house, but not so large that they’ll let in rain or predators.

Drainage:

To further combat moisture, make sure your birdhouse has a slightly slanted roof to allow rainwater to run off easily. Consider adding a small overhang to provide extra protection.

Predator Protection:

Predators are a major threat to nesting birds. To protect your feathered tenants, ensure the entrance hole is small enough to deter larger birds, squirrels, and snakes. You should also think about adding a baffle below the entrance to deter climbing predators like raccoons and cats. We’ll cover this in more detail later.

Size Matters:

Make sure the birdhouse is appropriately sized for the species you are hoping to attract. Research the specific requirements for your target bird to ensure it’s a comfortable fit. A birdhouse that's too small or too large won't be appealing.

Construction Techniques for a Long-lasting Birdhouse

Okay, let’s get down to the nitty-gritty â€" building your birdhouse! Here are some tips for ensuring a durable construction:

Accurate Cuts and Joints:

Precise cuts are vital for a strong, well-fitting structure. Use a sharp saw to minimize splintering and ensure all joints are tight and secure. Consider using wood glue in addition to nails or screws to create a strong bond between pieces.

Exterior Finish:

While many people choose to leave the natural beauty of the wood to show, you can add an exterior finish for extra protection. A high-quality exterior-grade wood sealant or paint will help repel moisture and protect against UV damage. Make sure it’s specifically designed for exterior use and non-toxic to birds.

Hardware Choices:

Use exterior-grade screws or nails made of galvanized steel or stainless steel to prevent rusting. These will hold up better to the elements and won't weaken over time.

Building a Simple, Durable Birdhouse: A Step-by-Step Guide

(Note: This is a simplified example; specific dimensions will vary depending on the type of bird you are targeting. Always research the needs of the bird species before you build.)

  1. Cut the Wood: You'll need pieces for the sides, front, back, roof, bottom, and entrance hole.
  2. Assemble the Sides and Back: Glue and nail or screw the sides and back together to form the main body of the birdhouse.
  3. Add the Front: Attach the front piece, making sure the entrance hole is correctly sized and positioned.
  4. Attach the Bottom: Secure the bottom piece to the base.
  5. Add the Roof: Attach the roof, ensuring it’s slightly angled for drainage.
  6. Add Ventilation Holes: Drill a few small ventilation holes near the top.
  7. Apply a Finish: If desired, apply an exterior-grade sealant or paint.

Remember, detailed plans are available online for various birdhouse designs, so feel free to search for one that suits your skill level and the bird species you wish to attract.

Adding a Baffle: Extra Protection from Predators

Adding a baffle beneath the entrance will significantly reduce the risk of predators reaching the nesting cavity. You can make one from a simple piece of metal or even a plastic cone. The key is to make it wide enough that predators can’t easily climb around it.

Mounting Your Birdhouse

Finally, where you place your birdhouse matters! Locate it in a sheltered spot, away from direct wind and rain, and preferably near a source of food and water. Mount it securely using appropriate hardware for the tree or post you select.

Commonly Asked Questions

Q: How long should a birdhouse last?

A: With proper construction and materials, a well-built birdhouse should last for many years, even decades! Regular inspection and maintenance can extend its lifespan.

Q: What kind of paint should I use?

A: Use exterior-grade, non-toxic paint specifically designed for outdoor use and safe for birds. Avoid using bright or glossy colors, as these can be harmful to birds.

Q: Do I need to clean my birdhouse?

A: Yes, ideally after the nesting season ends. This helps remove parasites and prevents the buildup of harmful bacteria.

Q: What if I see a predator near my birdhouse?

A: Observe from a distance and consider adding further predator protection if necessary (a larger baffle, for example).

Happy building, and happy birding!

Continue reading →

Durable Woodworking Benches for Heavy-Duty Projects

0 comments

Unwavering Strength: Building Durable Woodworking Benches for Heavy-Duty Projects

The heart of any serious woodworking shop beats strong with a reliable workbench. It's more than just a surface; it's a steadfast partner in creation, enduring the relentless pounding of hammers, the pressure of clamps, and the weight of ambitious projects. For heavy-duty work, flimsy construction simply won't suffice. This article dives deep into building woodworking benches that withstand the test of time and the rigors of demanding projects, transforming your workshop from a space of frustration into a haven of productivity.

Choosing the Right Materials: The Foundation of Durability

The longevity of your workbench hinges on the quality of its components. Forget lightweight materials; this is where strength reigns supreme. Hardwoods like maple, oak, or beech offer exceptional hardness and resistance to wear. Their dense grain structure stands up to repeated impacts, resisting dents and scratches that would mar softer woods. Consider using lumber with a minimum thickness of 2 inches for the top and legs for unparalleled resilience. Don't skimp on the fasteners either; heavy-duty galvanized bolts and screws provide superior strength and corrosion resistance, ensuring your bench remains a reliable fixture for years to come. For added stability, explore using steel or heavy-duty angle iron for critical structural components.

Understanding Wood Grain Orientation: A Key to Strength

Never underestimate the importance of wood grain orientation. For maximum strength, arrange the wood grain of your workbench top so it runs parallel to the length of the bench. This configuration provides superior resistance to splitting under pressure. Similarly, ensure the grain of the legs runs vertically to maximize their load-bearing capacity. Careful attention to these details significantly improves the overall durability and prevents premature failure.

Construction Techniques: Building for Strength and Stability

The construction method directly impacts the bench's robustness. Forget flimsy joinery; employ robust techniques designed to withstand heavy use. Mortise and tenon joints, known for their exceptional strength and stability, should be your go-to choice for connecting the legs and the bench top. These meticulously crafted joints resist racking and twisting, ensuring the bench remains unwavering under pressure. Reinforce these joints with additional wood glue and screws for even greater security. Consider adding aprons or stretchers between the legs for added stability and to prevent racking. This is especially vital for heavier benches and larger work surfaces.

Adding Essential Features: Enhancing Functionality and Durability

Beyond the core structure, thoughtful additions further enhance both the functionality and durability of your workbench. Consider these additions:

  • Heavy-duty bench dogs and dog holes: These allow for secure clamping and workpiece support.
  • A thick, durable workbench top: Choose a material like solid hardwood or epoxy-coated plywood for exceptional wear resistance.
  • Steel reinforcement plates: Use them at high-stress points for added strength.
  • A vise: A robust vise firmly attached to your bench adds unmatched clamping power and versatility.

Finishing Touches: Protecting Your Investment

After constructing your robust workbench, protect your investment with a durable finish. A coat of high-quality varnish, polyurethane, or even epoxy resin protects the wood from moisture, scratches, and stains, maintaining its appearance and prolonging its lifespan. A well-finished workbench not only looks great but also stands up better to the daily wear and tear of a busy workshop. Regular maintenance, like occasional sanding and reapplication of the finish, will further ensure the longevity of your invaluable workbench.

By carefully selecting materials, employing robust construction techniques, and applying a protective finish, you can craft a woodworking bench that stands as a testament to its strength and enduring quality. This is not just a piece of furniture; it is a steadfast companion in your woodworking endeavors, ready to handle even the most demanding projects for years to come.

Continue reading →

Simple and Affordable Picnic Table Plans for Small Yards

0 comments

Simple & Affordable Picnic Table Plans for Small Yards

Hey there, fellow outdoor enthusiasts! Dreaming of those idyllic summer picnics but lacking the space (or the budget) for a fancy, store-bought picnic table? Don't worry, you're not alone! Many of us crave that outdoor dining experience without breaking the bank or sacrificing precious yard space. That's why I'm here to share some super simple and affordable picnic table plans perfectly suited for smaller yards. Get ready to build your own piece of outdoor paradise!

Choosing the Right Design for Your Space

Before we jump into the actual plans, let's talk about picking the right style for your tiny backyard. A standard picnic table might be a bit overwhelming in a small space. Consider these options:

Space-Saving Designs:

  • Half-Table: Think of a cozy bench attached to a smaller table. Perfect for intimate meals or a quick coffee break. This design takes up significantly less room than a full-sized table.
  • Folding Picnic Table: These are a lifesaver for limited space! When not in use, you can fold them away, neatly storing them in a shed or against a fence. Several DIY plans exist online for building your own.
  • Bench-attached Table: This is similar to a half-table, but instead of a bench, the table is attached to a wall or fence. It's a great space saver, perfect for narrow patios or walkways.

Material Matters:

Your choice of material will significantly impact both the cost and the look of your picnic table. Let's explore some popular and budget-friendly options:

  • Recycled Pallets: Believe it or not, you can build a sturdy and surprisingly attractive picnic table from repurposed pallets! This is incredibly affordable, as you might even find free pallets locally. Just be sure to thoroughly clean and sand them before assembly.
  • Untreated Lumber: This is a classic and reliable choice. While it might cost a bit more than pallets, it offers more control over the final look and longevity of the table. Pine is a popular and readily available option.
  • Pressure-Treated Lumber: If you plan to keep your picnic table outdoors year-round, especially in a climate with lots of rain or snow, pressure-treated lumber is the way to go. It's resistant to rot and insects, but ensure it's treated with a water-based preservative for safety.

Building Your Simple Picnic Table: A Step-by-Step Guide (using Untreated Pine)

This guide focuses on a simple, half-picnic table design using untreated pine. You can adjust dimensions based on your space.

Materials You'll Need:

  • Four 4x4 pine posts (approximately 30 inches long for legs)
  • Two 2x4 pine boards (approximately 48 inches long for table top supports)
  • One 2x6 pine board (approximately 48 inches long for the table top)
  • Two 2x4 pine boards (approximately 48 inches long for bench supports)
  • Five 2x4 pine boards (approximately 48 inches long for bench seating)
  • Exterior wood screws (various lengths)
  • Wood glue
  • Level
  • Drill
  • Measuring tape
  • Sandpaper
  • Wood stain or paint (optional)

Tools You'll Need:

  • Drill/Driver
  • Tape Measure
  • Level
  • Safety Glasses
  • Saw (circular saw or hand saw)
  • Pencil

Construction Steps:

  1. Assemble the Legs: Use two of your 4x4 posts for each leg of the table and bench. Attach them securely using wood screws and glue.
  2. Attach Table Top Supports: Once your legs are secure, attach the 2x4 supports to the top of the table legs to create a sturdy frame. Ensure everything is level.
  3. Attach the Table Top: Secure the 2x6 tabletop to the supports with wood screws. Pre-drill holes to avoid splitting the wood.
  4. Assemble Bench Supports: Follow the same process as the table top supports, but attach them to the remaining two 4x4 posts, ensuring the bench is the correct height from the ground.
  5. Attach Bench Seating: Attach the 2x4 boards to the bench supports to create the seating area. Leave a small gap between the boards for comfort and water drainage.
  6. Sand and Finish: Sand all surfaces smooth, paying attention to any sharp edges. Apply wood stain or paint for protection and aesthetic appeal.

Tips for Keeping it Affordable

Building your own picnic table is inherently more affordable than buying one, but there are still ways to keep costs down:

  • Source materials wisely: Check local lumber yards for sales or discounted wood. Consider using reclaimed or repurposed materials whenever possible.
  • Buy in bulk: Purchasing screws and other hardware in bulk can often save money in the long run.
  • Borrow tools: If you don't own all the necessary tools, ask friends or family if you can borrow them to avoid rental costs.
  • Skip the fancy finishes: A simple stain or a coat of paint will do the trick; you don't need expensive, high-end finishes.

Frequently Asked Questions

Here are some common questions I get about building DIY picnic tables:

Q: How long does it take to build a simple picnic table?

A: Depending on your experience and the complexity of the design, building a simple picnic table can take anywhere from a few hours to a full weekend.

Q: Can I build this picnic table without any prior woodworking experience?

A: Absolutely! This plan is designed to be beginner-friendly. Just take your time, follow the instructions carefully, and don’t hesitate to seek help from more experienced DIYers if needed.

Q: How durable is a DIY picnic table?

A: The durability of your picnic table will depend on the materials you use and the quality of your construction. Using pressure-treated lumber and securing all joints properly will ensure a long-lasting table.

Q: What if I make a mistake while building?

A: Don't worry, everyone makes mistakes! Woodworking is a learning process. If you make a mistake, try to fix it, or if it's significant, you may need to start again with a new piece of wood.

Q: Can I customize my picnic table design?

A: Definitely! These plans are just a starting point. Feel free to adjust dimensions, add features like a built-in umbrella hole, or change the design to better suit your needs and preferences.

Happy building! I hope this guide helps you create your perfect, affordable, and space-saving outdoor picnic haven. Don’t forget to share pictures of your finished table â€" I’d love to see it!

Continue reading →

Woodworking Bench with Metal Frame for Added Strength

0 comments

A Robust Synthesis: Designing and Constructing a Woodworking Bench with a Metal Frame for Enhanced Durability

The woodworking bench, a cornerstone of any workshop, demands robust construction capable of withstanding the rigors of daily use. While traditional all-wood designs offer a certain charm, incorporating a metal frame significantly elevates the bench's strength, stability, and longevity. This article provides a comprehensive guide to designing and constructing such a hybrid bench, emphasizing material selection, dimensional considerations, and assembly techniques to ensure a high-quality, long-lasting workpiece.

I. Design Considerations: Balancing Aesthetics and Functionality

The initial phase involves meticulous planning to optimize the bench's functionality and aesthetic appeal. A well-considered design minimizes material waste, enhances ergonomics, and maximizes the bench's working capacity. Key factors to contemplate include:

A. Overall Dimensions and Work Surface Area

The dimensions of the bench should be tailored to the user's height, workspace constraints, and anticipated projects. A standard woodworking bench typically ranges from 6 to 8 feet in length and 2 to 3 feet in depth. The work surface height is crucial for ergonomic comfort, generally positioned around 32 to 36 inches from the floor. Consider the types of projects you will be undertaking to determine the ideal work surface area. Larger projects necessitate a more extensive surface.

B. Frame Material Selection and Fabrication

The metal frame forms the structural backbone of the bench, providing crucial rigidity and load-bearing capacity. Steel is the preferred material due to its high strength-to-weight ratio and resistance to warping or bending under significant stress. Rectangular steel tubing, with dimensions ranging from 1.5 inches x 1.5 inches to 2 inches x 2 inches, offers a balance of strength and manageable weight. Consider using thicker-walled tubing for areas subjected to higher stress, such as the legs and support beams. Fabrication can be accomplished through welding, which provides the strongest and most permanent connection, or through bolting, a more accessible method for those without welding equipment.

C. Wood Selection for the Work Surface and Accessories

The work surface material must exhibit exceptional hardness, durability, and resistance to wear and tear. Hardwoods such as maple, beech, or oak are ideal choices, providing a robust and smooth working surface. Consider using multiple layers of wood glued together to create a more stable and less prone to warping work surface. The thickness of the work surface should be substantial, typically ranging from 1.5 inches to 2 inches, to withstand heavy impacts and clamping forces. Accessories such as vises, dog holes, and tool trays can be integrated into the design to enhance functionality.

II. Construction Techniques: Precision and Durability

The construction process demands meticulous attention to detail to guarantee a structurally sound and aesthetically pleasing bench. Each step requires precision to ensure the bench's long-term durability and functionality. The following steps outline the construction process:

A. Metal Frame Assembly

Begin by cutting the steel tubing to the precise dimensions determined during the design phase. Ensure accurate measurements to avoid inconsistencies that compromise the frame's structural integrity. If welding, use appropriate safety precautions, including a welding mask and gloves. Ensure all welds are strong and free of defects. If bolting, utilize high-strength bolts and washers to ensure a secure and robust connection. Squareness and alignment should be rigorously checked throughout the process to ensure a stable and level frame.

B. Wood Work Surface Construction

The work surface should be constructed from multiple layers of hardwood glued together for increased stability and durability. Use a high-quality wood glue designed for exterior applications to enhance moisture resistance. Once the glue has cured, plane the surface to ensure a smooth, level, and uniform working area. Consider adding a protective finish, such as polyurethane or epoxy resin, to improve the wood's resistance to scratches, moisture, and staining. The finish should be applied in multiple thin coats to prevent cracking or bubbling.

C. Attaching the Work Surface to the Metal Frame

Securely attach the work surface to the metal frame using robust fasteners. Consider using carriage bolts, which are threaded on both ends, to create a secure and strong connection. Countersink the bolts into the wood to create a flush surface and prevent interference with tools. Ensure the work surface is securely fastened and level to prevent wobbling or instability during use.

D. Integrating Accessories

Once the frame and work surface are securely attached, integrate any planned accessories, such as vises, dog holes, or tool trays. Ensure that these accessories are securely fastened and aligned correctly to maximize their functionality and durability. Dog holes, evenly spaced across the work surface, provide versatile clamping points for securing workpieces. Vises are crucial for holding workpieces firmly during various operations. Tool trays provide convenient storage for frequently used tools, enhancing workflow efficiency.

III. Finishing Touches and Maintenance

The final stages involve refining the bench's aesthetics and implementing maintenance practices to ensure its longevity. These final steps enhance both the visual appeal and the lifespan of the bench.

A. Surface Treatment and Finishing

Apply a protective finish to the metal frame to prevent rust and corrosion. A powder coat finish offers excellent durability and aesthetic appeal. For the wood surface, apply multiple coats of a durable finish such as polyurethane or epoxy resin to protect against scratches, moisture, and staining. Allow ample drying time between coats to ensure proper curing and a high-quality finish.

B. Regular Inspection and Maintenance

Regularly inspect the bench for any signs of wear or damage. Tighten any loose bolts or screws as needed. Address any rust or corrosion on the metal frame promptly to prevent further deterioration. Keep the work surface clean and free of debris to prevent damage and maintain its aesthetic appeal. Periodically refinish the wood surface to maintain its protection and appearance. Proactive maintenance extends the bench's lifespan and ensures its continued functionality.

IV. Conclusion: A Legacy of Durability

Constructing a woodworking bench with a metal frame represents a significant investment in the quality and longevity of your workspace. By meticulously following the design and construction guidelines outlined in this article, you can create a robust, functional, and aesthetically pleasing bench that will serve as a reliable companion for years to come. The incorporation of a metal frame significantly enhances the bench's strength and stability, exceeding the capabilities of traditional all-wood designs. This robust construction guarantees a durable and dependable work surface for generations of woodworking projects. The detailed attention to material selection, precision construction, and ongoing maintenance ensures that this woodworking bench will become a cornerstone of your workshop, a testament to your dedication to craftsmanship.

Continue reading →