Saturday, 9 November 2024

How to make a portable grill gazebo for easy setup and take down

0 comments
How to make a portable grill gazebo for easy setup and take down


Hey there, fellow grill masters! Tired of battling the sun, rain, or pesky bugs while trying to cook up a storm? Well, you're not alone. That's why I decided to build a portable grill gazebo, and let me tell you, it's been a game-changer!

Now, I know what you're thinking, "A gazebo? That sounds like a lot of work!" But trust me, it's actually pretty straightforward, especially if you're a bit handy with tools. Plus, the feeling of cooking under your own personal grilling sanctuary, no matter where you go, is priceless.

The Perfect Blend of Function and Fun

The key to a great portable gazebo is finding the right balance of functionality and ease of setup. You want something sturdy enough to withstand the elements, yet lightweight and compact for easy transport. Here's how I tackled the design:

The Frame:

Light and Strong: I chose aluminum poles for the frame. They're lightweight but surprisingly strong, perfect for easy carrying and a solid structure. You can find these at most hardware stores.
Easy Assembly: I opted for a telescoping design, similar to a tent pole. This lets you adjust the height and makes it incredibly easy to assemble and disassemble.
Stable Base: I used heavy-duty, adjustable feet for a stable base. These are essential, especially if you're on uneven ground.

The Canopy:

Waterproof and Breathable: I went with a waterproof, breathable canopy fabric. This will keep you dry in a sudden downpour, but also allows for airflow to prevent condensation build-up.
Easy to Clean: I chose a material that's easy to wipe down, especially since grilling inevitably involves some splattering.
UV Protection: I made sure to get a canopy with UV protection to keep the sun's rays at bay. This is super important, especially during those long summer BBQs.

The Grill Station:

Portable and Adjustable: I used a heavy-duty, portable grill that could be adjusted in height. This allows for easy maneuvering and provides optimal grilling height.
Convenient Storage: I added a small storage shelf beneath the grill to keep grilling tools, condiments, and other essentials close at hand.

Putting It All Together:

1. Plan and Prep: Before you start, sketch out your design and gather all your materials. Measure your grill and decide on the canopy size you need.
2. Assemble the Frame: Connect the telescoping poles using the provided connectors, ensuring they are secure and sturdy.
3. Attach the Canopy: Use straps or clips to attach the canopy to the frame. Make sure it's fitted snugly and securely.
4. Install the Grill: Attach your portable grill to the frame, making sure it's at a comfortable height.
5. Add the Storage: Secure the storage shelf to the grill station.

Tips for Success:

Consider Your Needs: Think about how much space you'll need for your grill and guests.
Choose the Right Materials: Opt for durable, weather-resistant materials that can withstand the elements.
Go Modular: Make the gazebo modular so you can easily customize it with add-ons like sidewalls or a table.
Safety First: Make sure your grill is safely secured to the frame and that you have a fire extinguisher nearby.
Enjoy the Process: Building your own portable grill gazebo is a fun project, so don't be afraid to get creative and add your own personal touches!

Beyond the Basics

Now, let's talk about some fun extras you can add to your gazebo for an even more enjoyable grilling experience:

Lighting: String lights around the canopy for a festive ambiance.
Sidewalls: Add sidewalls to create a more enclosed space and provide shelter from the wind.
Table: Include a small table attached to the frame for additional counter space and food prep.
Storage Pockets: Add pockets to the canopy or sidewalls to store grilling tools and utensils.

A Grill Master's Dream Come True

Building your own portable grill gazebo is a rewarding project. You'll have a custom grilling haven that can be set up at your backyard, the park, the beach, or anywhere you desire. Just imagine, you'll be the envy of all your neighbors with your stylish and functional grill station. So, what are you waiting for? Grab your tools and let's get grilling!

Continue reading →

How to make a grill gazebo with a built-in fire pit for ambiance

0 comments
How to make a grill gazebo with a built-in fire pit for ambiance

Alright, listen up, fellow grilling enthusiasts! Let's talk about turning your backyard into a grilling paradise with a gazebo that's got your back (and your burgers) covered. We're not just talking about a regular ol' gazebo here â€" we're talking a gazebo with a built-in fire pit to create the ultimate ambiance for your next cookout. Imagine this: you're grilling up a storm, the aroma of sizzling meat fills the air, and you're surrounded by friends and family. The sun is setting, casting warm hues across the sky, and a crackling fire in the pit adds a cozy touch to the evening. Sounds pretty amazing, right?

Well, guess what? You can make this dream a reality! We're going to break down the steps to building your very own gazebo-fire pit combo. This isn't just about functionality; it's about creating a space that truly embodies the spirit of outdoor cooking and gathering.

1. Design Your Masterpiece:

First things first, you need a plan â€" a blueprint for your grilling masterpiece. You're basically a gazebo architect here.

Size Matters: Consider the size of your space and how many people you want to comfortably accommodate. You don't want to feel cramped!
Shape and Style: Choose a shape that fits your backyard aesthetic. A square or rectangular gazebo offers a more classic look, while a round gazebo creates a cozy, intimate feel.
Roof Style: Do you want a simple, flat roof, or something more elaborate like a gable roof? Keep in mind that a gable roof will offer more protection from rain and snow.
Fire Pit Placement: The fire pit should be located within the gazebo, but consider the size and location of your grill. You don't want to be constantly bumping into it or getting smoke in your eyes!

2. Gathering Your Gear:

Now it's time to gather your tools and materials. Here's a list to get you started:

Gazebo Frame: You'll need a strong and sturdy frame that can support the weight of the roof and the fire pit. Consider using prefabricated gazebo kits or building your own frame from treated lumber.
Roofing Material: Select a material that's durable and weather-resistant. Options include metal, canvas, or polycarbonate panels.
Fire Pit: There are various fire pit options available. You can build your own using bricks or concrete blocks, or purchase a prefabricated fire pit. Remember to choose one that's designed for outdoor use and complies with local fire codes.
Building Materials: This includes lumber, screws, nails, concrete mix, and any other necessary materials for building the gazebo and fire pit.
Safety Gear: Don't forget safety gear like gloves, safety glasses, and a respirator.

3. Laying the Foundation:

Building a gazebo with a built-in fire pit requires a solid foundation.

Clear the Area: Remove any obstacles from the area where you plan to build.
Leveling Up: Make sure the ground is level and stable. You can use gravel or sand to create a smooth surface for the foundation.
Creating a Base: If you're using a prefabricated fire pit, you may need to create a concrete base for it. Follow the manufacturer's instructions carefully.

4. Building the Gazebo Frame:

Now comes the fun part: constructing the gazebo frame!

Assemble the Base: Start by assembling the base of the gazebo frame according to your design. You may need to cut lumber to specific sizes.
Erecting the Walls: Construct the walls of the gazebo, ensuring that they're securely attached to the base.
Adding the Roof: Assemble the roof structure and attach it to the walls. Be sure to use strong connections that can handle the weight of the roof.
Finishing Touches: Add any decorative features or details, such as latticework or a decorative border.

5. Integrating the Fire Pit:

This is the key element that sets your gazebo apart!

Choosing Your Fire Pit: As mentioned before, you can build your own fire pit or purchase a prefabricated one.
Securely Mounting: If you're building your own fire pit, carefully construct it within the gazebo, ensuring that it's sturdy and stable. If you're using a prefabricated fire pit, follow the manufacturer's instructions for installation.
Protecting the Floor: Place a layer of fireproof material around the fire pit to protect the gazebo floor. This could be a layer of brick pavers or a fire-resistant mat.

6. Adding the Finishing Touches:

Now it's time to personalize your grilling haven!

Lighting: Add some outdoor lighting for ambiance. Consider string lights, lanterns, or solar-powered lights.
Furniture: Choose comfortable seating and tables for your guests.
Decor: Enhance the space with decorative elements like plants, flowers, or wind chimes.

7. Safety First:

Building a gazebo with a fire pit involves using tools and materials that can be dangerous if not handled properly.

Safety Gear: Always wear safety gear, such as gloves, safety glasses, and a respirator.
Fire Safety: Follow fire safety regulations, including keeping a fire extinguisher readily accessible.

With a little planning and effort, you can create an amazing grilling haven that you'll love to enjoy for years to come. And hey, if you're feeling extra ambitious, you could even add a bar area or an outdoor kitchen for your gazebo â€" the possibilities are endless! So go ahead, embrace your inner grilling guru and turn your backyard into a true oasis!

Continue reading →

Building a simple wooden clock: a beginner’s guide

0 comments
Building a simple wooden clock: a beginner’s guide


For those seeking a rewarding woodworking project that blends practicality with aesthetics, crafting a simple wooden clock is an ideal choice. This comprehensive guide will walk you through the process, from material selection to the final finishing touches, empowering you to create a unique and functional timepiece for your home or as a thoughtful gift.

Materials:

Wood: Opt for a stable hardwood like cherry, walnut, or maple for a classic look and durability. Alternatively, pine or plywood can provide a more affordable option. Consider the size and shape of your desired clock face when selecting the wood.
Clock Movement: This is the heart of your clock. Choose a quartz movement for accuracy and ease of installation. The movement's size will dictate the size of your clock face.
Clock Hands: Select hands that complement the style of your clock and are compatible with your movement.
Wood Glue: A strong wood glue is essential for bonding the clock components.
Wood Stain or Paint: Enhance the natural beauty of your wood or customize the clock's appearance with a stain or paint of your choice.
Clear Coat: A polyurethane or varnish will protect the wood and enhance its finish.
Clock Making Kit (Optional): These kits typically include the movement, hands, and mounting hardware, making the process more straightforward.
Tools:
Saw: A handsaw, jigsaw, or table saw for cutting the wood to size.
Drill: For drilling holes for the movement and hands.
Sandpaper: Various grit sizes for smoothing the wood.
Clamps: To secure the wood during gluing.
Measuring Tape: For accurate dimensions.
Pencil: For marking the wood.
Screwdriver: For assembling the clock movement.

Step-by-Step Guide:

1. Designing the Clock Face:

Shape and Size: Determine the desired shape and size of your clock face. Classic round, square, or rectangular designs are common. Consider the space where the clock will be displayed and the size of your chosen movement.
Creating a Template: Draw your chosen shape on paper, ensuring it's proportionally scaled to your desired clock size. You can then use this template to trace the design onto your chosen wood.

2. Cutting the Wood:

Precise Measurements: Accurately measure and mark your wood based on your template. Ensure your cuts are precise for a clean and symmetrical clock face.
Cutting Technique: Use your chosen saw to cut out the clock face shape. Take your time and make smooth, even cuts.

3. Sanding and Finishing:

Smooth Surface: Sand the cut edges and surfaces of the clock face to eliminate any rough spots. Progress through various grit sandpaper (starting with coarser grit and finishing with finer) for a smooth finish.
Staining or Painting: Apply a wood stain or paint to enhance the wood’s appearance or create a custom look. Ensure the stain or paint is applied evenly and allowed to dry completely.

4. Preparing the Clock Movement:

Mounting Hole: Carefully drill a hole in the center of the clock face that matches the size of the movement’s mounting nut.
Connecting the Hands: Align the hands on the movement according to the instructions provided.

5. Installing the Movement:

Secure Mounting: Position the movement on the back of the clock face and tighten the mounting nut.
Test Operation: Insert batteries and test the movement’s operation.

6. Attaching the Clock Hands:

Secure Hands: Carefully align the hands on the movement’s spindles and tighten the securing nuts.

7. Adding the Clock Hands:

Placement: Align the hands on the clock face according to your design and preference.
Securing: Tighten the screws or nuts on the hands to secure them in place.

8. Finishing Touches:

Clear Coat: Apply a clear coat of polyurethane or varnish to protect the wood and enhance its finish. Allow the clear coat to dry completely before handling the clock.

Tips for Success:

Practice Makes Perfect: Begin with simpler projects or consider purchasing pre-cut clock face blanks.
Measure Twice, Cut Once: Precision is key. Double-check your measurements to ensure accurate cutting and avoid mistakes.
Sanding Smoothly: Thorough sanding is essential for a professional finish. Don't rush this step.
Clean Up: Keep your workspace clean and organized to prevent dust from contaminating your project.
Take Your Time: This project involves several steps. Allow ample time to complete each step carefully for the best results.

Variations and Customization:

Materials: Explore different wood species, incorporating unique grains and patterns into your design.
Shapes and Sizes: Break away from traditional shapes and experiment with more intricate designs.
Inlays and Decorations: Add decorative elements like wood inlays, metal accents, or painted designs to personalize your clock.
Finishes: Experiment with various stains, paints, and clear coats to achieve unique looks and finishes.

Beyond the Basics:

Clock Pendulums: Consider adding a pendulum to your clock for a more traditional and charming look.
Wall Mounting: Craft a custom bracket or frame for mounting your clock on a wall.
Unique Clocks: Explore more complex designs, such as grandfather clocks or cuckoo clocks, as you gain experience.

Conclusion:

Building a simple wooden clock is a rewarding and fulfilling woodworking project. By carefully following the steps outlined in this guide, even beginners can create a functional and beautiful timepiece to cherish for years to come. Remember, the key to success lies in patience, attention to detail, and a touch of creativity. So gather your tools, choose your materials, and embark on this exciting journey of crafting your own wooden clock!

Continue reading →
Friday, 8 November 2024

Diy guide to building a wooden gun cabinet with extra storage space

0 comments
Diy guide to building a wooden gun cabinet with extra storage space


For firearm owners, a secure and organized storage solution is paramount. A well-constructed gun cabinet not only protects valuable firearms and ammunition from unauthorized access but also enhances the aesthetic appeal of your home. This guide will provide a comprehensive overview of building a wooden gun cabinet with additional storage space, catering to both beginners and experienced woodworkers.

I. Planning and Design Considerations:

A. Purpose and Functionality:

Firearm Capacity: Determine the number of firearms you wish to store and their dimensions. Consider the future growth of your collection.
Storage Needs: Plan for additional storage for ammunition, cleaning supplies, accessories, and other related items.
Aesthetic Preferences: Choose a style and finish that complements your existing décor.

B. Dimensions and Layout:

Height: Standard gun cabinets range from 5 to 8 feet tall. Ensure the cabinet fits comfortably within your chosen space.
Width and Depth: Consider the size of your firearms and the amount of storage space needed.
Interior Layout: Design shelves, drawers, and compartments to maximize space and organize your collection.

C. Material Selection:

Wood Species: Hardwoods such as oak, maple, cherry, or walnut offer durability, strength, and beautiful aesthetics.
Plywood: For the cabinet's interior, plywood provides stability and cost-effectiveness.
Hardware: Select sturdy hinges, drawer slides, and locking mechanisms.

D. Safety and Security:

Lock: Invest in a high-quality, tamper-resistant lock. Consider a key lock, combination lock, or electronic lock for increased security.
Cabinet Construction: Employ robust construction techniques for maximum stability and security.

II. Tools and Materials:

A. Tools:

Table Saw: For accurate cutting of lumber.
Miter Saw: For precise angled cuts.
Router: For creating decorative edges and details.
Drill: For drilling holes and attaching hardware.
Sanding Tools: For smoothing surfaces and preparing for finishing.
Clamps: For holding wood pieces together during construction.
Measuring Tape and Level: For accurate measurement and alignment.

B. Materials:

Lumber: Hardwood boards, plywood, and moldings.
Hardware: Hinges, drawer slides, lock, handles, screws, and nails.
Wood Glue: For bonding wood pieces.
Wood Filler: For filling any gaps or imperfections.
Finishing Materials: Stain, paint, varnish, or other desired finishes.

III. Construction Process:

A. Cabinet Base:

Cutting: Cut the base panels from plywood or solid wood.
Assembly: Glue and screw the base panels together, ensuring squareness and stability.

B. Cabinet Sides and Back:

Cutting: Cut the side and back panels from plywood or solid wood.
Assembly: Glue and screw the side panels to the base. Attach the back panel using rabbets, dadoes, or screws.

C. Shelf and Drawer Construction:

Cutting: Cut shelves and drawer components according to your design.
Assembly: Glue and screw shelf and drawer components together, ensuring they fit within the cabinet.

D. Door Construction:

Cutting: Cut the door panels and frame pieces.
Assembly: Glue and screw the door frame pieces together, attaching the door panels with rabbets, dadoes, or screws.
Hinges: Install hinges on the door and cabinet sides, ensuring proper alignment.

E. Drawer Installation:

Installation: Install drawer slides on the drawer sides and cabinet frame.
Assembly: Fit the drawer boxes onto the slides.

F. Lock Installation:

Drilling: Drill the hole for the lock and install it according to the manufacturer's instructions.

G. Finishing:

Sanding: Sand the cabinet surfaces smooth, paying attention to corners and edges.
Finishing: Apply the desired finish, whether stain, paint, or varnish, in multiple coats for optimal durability.

IV. Additional Storage Features:

A. Gun Racks:

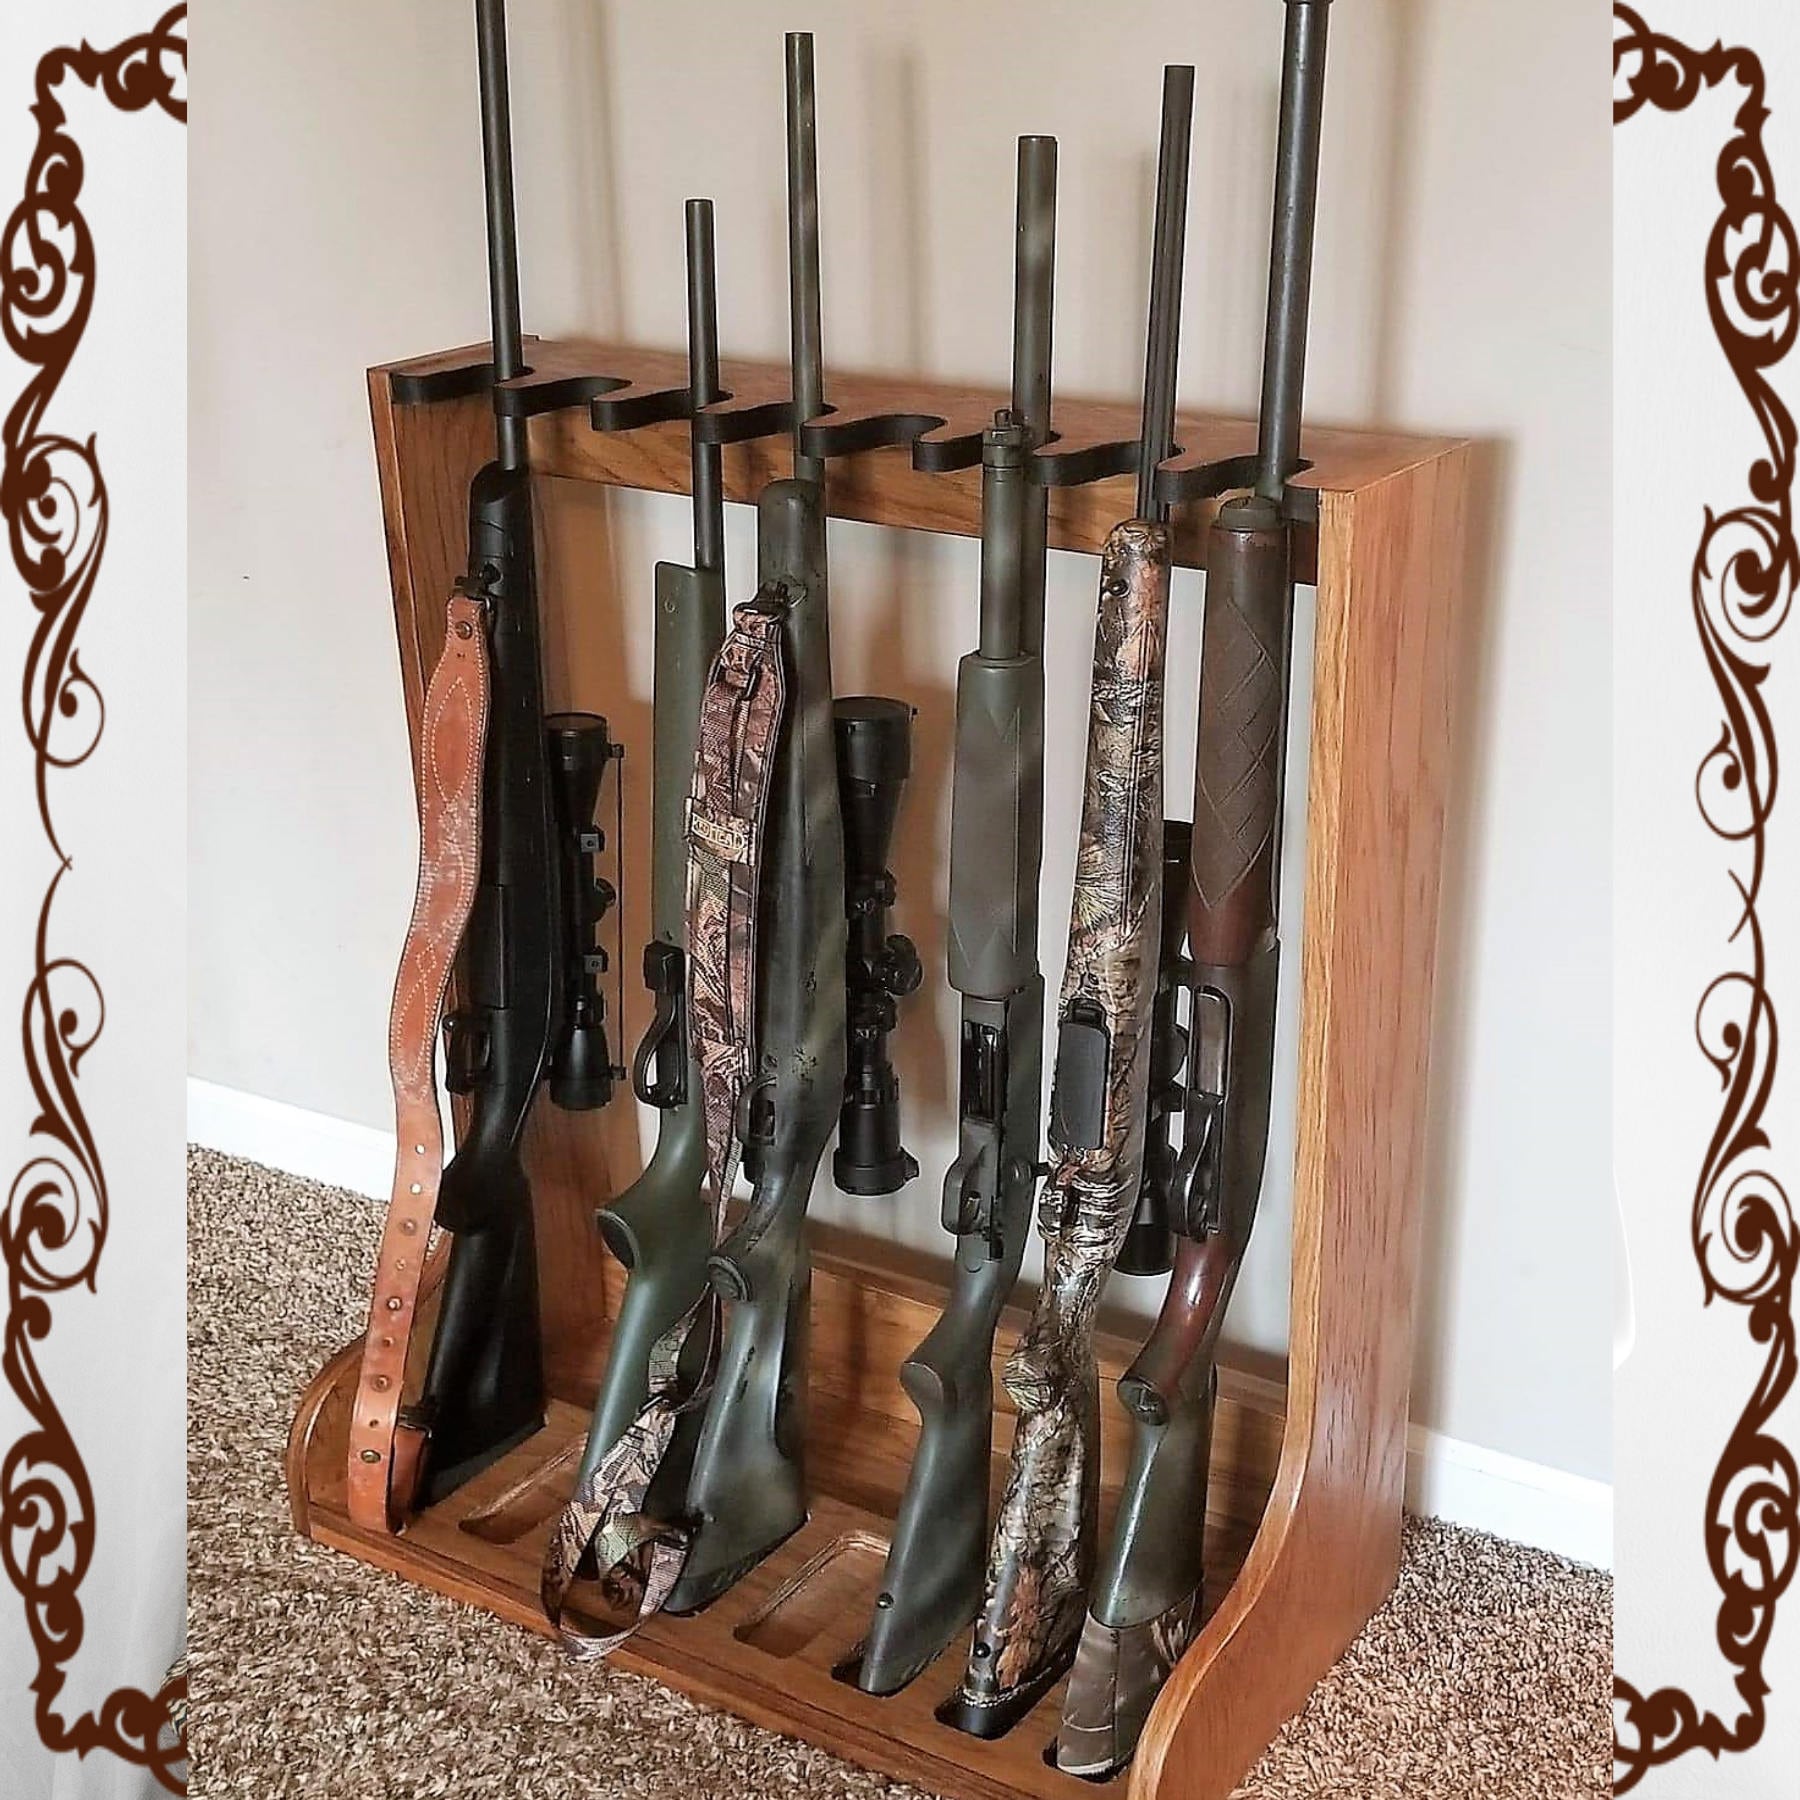
Vertical or Horizontal: Install vertical racks for long guns or horizontal racks for handguns.
Materials: Use metal, wood, or a combination of both.

B. Ammunition Storage:

Drawers: Dedicate drawers for storing ammunition securely.
Shelves: Use shelves with dividers to organize different types of ammunition.
Lockable Boxes: Consider using lockable boxes for extra security.

C. Cleaning Supplies and Accessories:

Shelves: Use shelves or drawers to store cleaning tools, oil, and other accessories.
Hooks: Install hooks for hanging cleaning rods and other items.

V. Safety and Security Measures:

A. Locking Mechanism: Ensure your chosen lock is tamper-resistant and reliable.

B. Secure Installation: Mount the cabinet securely to the wall using heavy-duty anchors or bolts.

C. Fire Safety: Consider installing a fire extinguisher nearby for added safety.

D. Childproof Measures: If you have children, ensure the cabinet has a secure lock and is inaccessible to them.

VI. Tips for Successful Building:

Accuracy: Measure twice, cut once. Precision is key to a well-constructed cabinet.
Plan Ahead: Prepare detailed plans and diagrams to minimize errors and ensure proper fit.
Patience: Building a gun cabinet requires patience and attention to detail.
Safety: Always prioritize safety by using appropriate tools and techniques.
Personalization: Add unique features and touches to make your cabinet a personal masterpiece.

Conclusion:

Building your own wooden gun cabinet is a rewarding project that combines practicality and craftsmanship. By following this comprehensive guide and incorporating your own design preferences, you can create a secure, organized, and aesthetically pleasing storage solution for your valuable firearms and accessories. Remember, safety and security should always be your top priorities, ensuring your firearms are stored responsibly and accessible only to authorized individuals.

Continue reading →

Diy wooden gun cabinet: how to make a custom-fit storage piece

0 comments
Diy wooden gun cabinet: how to make a custom-fit storage piece


For firearm owners seeking both secure storage and a personalized touch, building a custom-fit wooden gun cabinet offers unparalleled satisfaction. This project, while requiring time and skill, presents a rewarding journey into woodworking and a demonstrably secure solution for your firearms.

This comprehensive guide outlines the process of crafting a bespoke wooden gun cabinet, from initial planning to final finishing touches.

I. Planning and Design

A. Defining Requirements:

1. Size and Capacity: Determine the number of firearms and associated accessories to be stored, considering dimensions for rifles, handguns, and other equipment. Ensure adequate space for safe and organized storage.

2. Location and Accessibility: Plan the cabinet's placement based on factors like visibility, proximity to power outlets (for future additions like lighting), and ease of access.

3. Style and Aesthetic: Choose a design that complements your existing décor, considering wood species, stain color, hardware, and overall aesthetic preferences.

B. Material Selection:

1. Wood Type: Opt for hardwoods like oak, cherry, walnut, or maple, known for their durability, resistance to warping, and aesthetic appeal. Softwoods like pine can be utilized, but may require additional support and finishing considerations.

2. Plywood or Solid Wood: Plywood offers affordability and stability, while solid wood provides a more traditional feel. Consider the weight, strength, and finishing needs for your specific design.

3. Hardware and Accessories: Select quality hinges, locks, and drawer slides for longevity and security. Consider adding features like adjustable shelves, dividers, and internal lighting for enhanced functionality.

C. Design and Sketching:

1. Preliminary Sketches: Create rough sketches illustrating the cabinet's exterior and interior dimensions, including doors, shelves, and internal compartments.

2. Detailed Drawings: Utilize drafting software or hand-drawn plans to accurately depict the cabinet's construction details, including measurements, joinery types, and material specifications.

II. Construction

A. Cutting and Joinery:

1. Precision Cutting: Employ a table saw, circular saw, or jigsaw to cut lumber to precise dimensions according to your drawings. Ensure accurate measurements and straight cuts for optimal assembly.

2. Joinery Techniques: Select appropriate joinery methods like dovetail joints, mortise and tenon joints, or dado joints for strong and aesthetically pleasing connections. Consider using glue and fasteners like screws or dowels for enhanced durability.

B. Assembly:

1. Dry Fit: Before gluing, perform a dry fit of all components to ensure accurate alignment and proper fit.

2. Glue-up: Apply wood glue to designated surfaces and carefully assemble the cabinet, clamping pieces together until the glue sets. Use additional fasteners like screws or dowels as needed for added security.

C. Door and Drawer Construction:

1. Door Panels: Create panels from plywood or solid wood, using appropriate joinery methods for stability.

2. Door Frames: Construct frames around the panels, incorporating rabbets or grooves for panel insertion and a tight fit.

3. Hinges: Install hinges to the door frames and cabinet sides, ensuring proper alignment and smooth operation.

4. Drawer Boxes: Build drawer boxes using plywood or solid wood, incorporating dovetail joints or other strong joinery techniques.

5. Drawer Slides: Attach drawer slides to the cabinet sides and drawer boxes, ensuring smooth and reliable drawer movement.

III. Finishing Touches

A. Sanding and Refinishing:

1. Sanding: Smooth all surfaces using progressively finer grit sandpaper to create a consistent finish. Remove sawdust and debris thoroughly.

2. Finishing: Apply stains, paints, or varnishes according to your desired aesthetic. Consider multiple coats for depth and protection.

B. Hardware Installation:

1. Handles and Knobs: Install door and drawer handles and knobs, ensuring proper alignment and functionality.

2. Locks: Install high-quality locks on doors and drawers, selecting types that meet your security needs and preferences.

C. Interior Fittings:

1. Shelves: Install adjustable shelves and dividers to accommodate different firearms and accessories.

2. Lighting: Consider adding internal lighting using LED strips or a dedicated fixture for enhanced visibility and security.

IV. Safety Considerations

A. Security:

1. Strong Locks: Utilize robust locks and locking mechanisms to deter unauthorized access.

2. Anchor to Wall or Floor: Secure the cabinet to the wall or floor using heavy-duty anchors and bolts to prevent theft.

B. Fire Safety:

1. Fire-Resistant Materials: Consider using fire-resistant wood finishes or fire-retardant materials within the cabinet to minimize fire hazards.

2. Smoke Detectors: Install smoke detectors near the cabinet to provide early warning in case of a fire.

C. General Safety:

1. Storage Best Practices: Store firearms unloaded, with ammunition separately and securely stored.

2. Childproofing: Install safety devices or measures to prevent children from accessing firearms within the cabinet.

V. Conclusion

Building a custom-fit wooden gun cabinet is a rewarding project that combines skill, dedication, and attention to detail. By carefully planning, executing, and incorporating safety considerations, you can create a secure and personalized storage solution that meets your specific needs and elevates your home décor. This bespoke piece of furniture not only protects your valuable firearms but also reflects your commitment to craftsmanship and security.

Continue reading →

Diy guide to building an in-wall gun cabinet with a fireproof design

0 comments
Diy guide to building an in-wall gun cabinet with a fireproof design

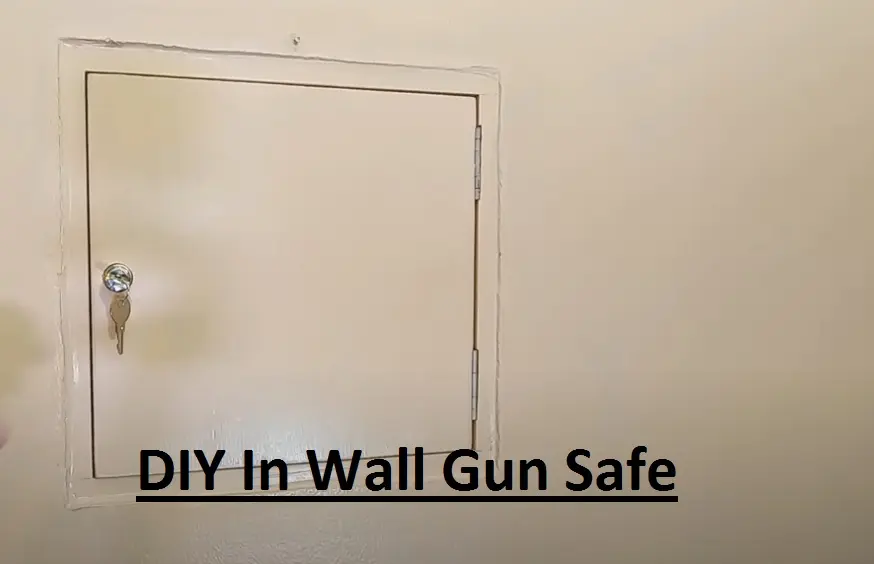
Alright, you want to build a safe and discreet way to store your firearms? You're thinking in-wall gun cabinet with a fireproof design? That's a smart move, and it's definitely doable with a little know-how and elbow grease. Let's break this down step by step, like we're sitting in a garage, talking guns and safety.

## Planning the Heist, I Mean, the Build!

First, you need to get your thinking cap on. There are a few things to consider before you start swinging a hammer:

1. Location, Location, Location:

Where in your wall is the best spot? Think accessibility, but also security. You don't want it right next to your front door, right?
What's behind that wall? If it's a bedroom or bathroom, you might want to reconsider. You don't want to mess with pipes or electrical wiring.
What about the wall itself? Is it drywall, plaster, or something else? Some materials will be easier to work with than others.

2. Size Matters:

How many guns do you need to store? Measure those babies! Make sure the cabinet is big enough, but not too big to be bulky.
What else do you want to store? Ammo, cleaning supplies, tools? Factor that into your size calculations.

3. Fireproof Fun:

We're talking about fireproof here, folks. We'll get into specifics later, but you need to choose the right materials for fire resistance.
How much fire protection do you need? A quick "hot fire" like a small kitchen fire, or something more intense?
Important: This is a DIY project, but you're dealing with fire safety. Be sure you understand the basics of fireproofing before you start.

## Let's Get Building, Baby!

Now, let's get to the fun part - the actual construction! This is a general guide, so you might need to adjust based on your specific needs and the wall you're working with.

1. The Framework of Fury:

Framing the Future: You'll need to build a sturdy frame within your wall for the cabinet. This usually involves 2x4s or 2x6s, depending on the size and weight you're dealing with. You can use standard framing techniques, securing the framing to the wall studs.
Fire Resistance: The framing needs to be strong, but it also needs to be fire-resistant. You can use fire-rated lumber or wrap the framing with fire-resistant drywall tape, or even use fire-resistant drywall for the entire cabinet.
Let There Be Light (Optional): If you want a little extra functionality, you can add a light fixture inside the cabinet. Make sure you use fire-resistant wiring and a fixture rated for enclosed spaces.

2. The Outer Shell:

Drywall or Plywood: You'll need to close off the cabinet with an outer layer. You can use drywall, plywood, or even something like cement board for extra fire resistance. Just make sure the material matches the existing wall.
Hidden Access: You need a way to get in and out, right? You can use a hidden door, a removable panel, or even a secret latch. Get creative! Just make sure it's secure and discreet.

3. The Fireproof Fortress:

Fireproofing the Core: This is where you create the fire-resistant core of your cabinet. You can use a few methods here:
Fire-Resistant Drywall: This is a good option, but you need to ensure the fire-resistant rating meets your needs. You can get a fire-rated drywall with a "type X" rating for more protection.
Fire-Resistant Spray Foam: This is a good option for sealing gaps and adding insulation. It's easy to use and creates a good barrier against heat. Just make sure the foam you choose is fire-resistant and meets local codes.
Fire-Resistant Paint: This is a good option for adding a final layer of fire protection. Many fire-resistant paints are available, but be sure to follow the manufacturer's instructions carefully.
The Final Touch: You might want to add a layer of drywall to the front side of your cabinet to match the rest of your wall.

4. The Finishing Touches:

Trim and Finishing: After the fireproofing, you'll want to cover up the edges and joints. This can be done with trim, molding, or even just some caulking. Make sure it blends in with the rest of your wall.
The Secret Entry: Don't forget to install your hidden door or panel! You can use hinges, magnets, or even a combination of both to create a secure, hidden access point.
Security: This is a gun cabinet, remember? You want to make sure it's locked up tight. Use heavy-duty locks and even a combination lock for extra security.

## Final Thoughts:

So there you have it! Building a fireproof in-wall gun cabinet might seem daunting, but it's definitely achievable. Remember, it's a good idea to consult with a professional if you're not comfortable with the project.

Just remember, safety is paramount. This is a serious project, so be careful and take the time to do it right. Good luck, and may your guns stay safe and sound!

Continue reading →

How to build a wooden gun case with sliding lids

0 comments
How to build a wooden gun case with sliding lids

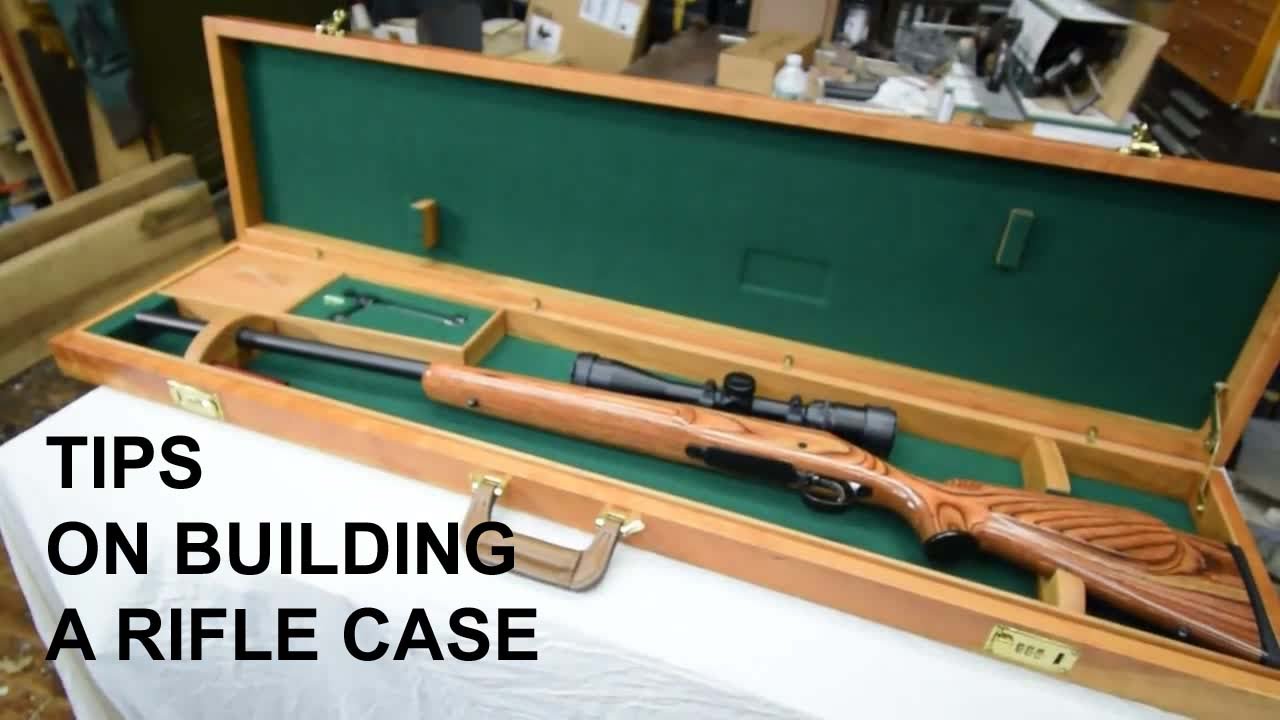
Alright, you wanna build a wooden gun case with sliding lids? Cool! It's a fantastic project that'll not only protect your precious firearms but also become a conversation starter in your gun room. Let's dive in and break it down step-by-step.

Step 1: Planning and Design

First things first, you gotta decide what kind of case you're aiming for. Do you need a compact case for a single pistol or something bigger for a rifle or shotgun? How many firearms do you want to store? Once you figure out the dimensions, think about the features you want. Do you need a lock? Maybe a compartment for accessories?

Step 2: Gathering Supplies

Now for the fun part - shopping! Here's a list of materials you'll need:

Wood: Choose a sturdy wood like oak, walnut, or maple. You can use plywood for the base, but make sure it's thick enough to support the weight of your firearms.
Sliding Lid Hardware: You'll need runners, guides, and a locking mechanism. There are different types available, so choose one that fits your design and budget.
Hardware: Hinges, screws, glue, wood filler, sandpaper, and any other hardware you need for your design.
Finishing Supplies: Stain, varnish, paint, or any other finish you prefer.

Step 3: Cutting and Assembling the Case

Now it's time to get your hands dirty. Using your plans as a guide, cut the wood for the case and the sliding lids. You'll need a saw, a jigsaw, or a table saw for this step.

For the case:

Cut the sides, bottom, and top panels to the desired size.
Cut the dividers if you need to separate different firearms.
Attach the dividers to the sides of the case using screws or glue.
Glue and clamp the sides to the bottom of the case, making sure the corners are aligned.
Once the glue dries, add the top panel, leaving a gap for the sliding lids.

For the sliding lids:

Cut the lids to the desired size and shape.
Attach the sliding lid hardware according to the manufacturer's instructions.

Step 4: Finishing Touches

Time to make your case look sleek and professional.

Sanding: Smooth out any rough edges and imperfections with sandpaper.
Finishing: Apply your preferred finish, whether it's stain, varnish, or paint. Make sure to follow the manufacturer's instructions for drying time.
Hardware Installation: Install hinges, locks, and any other hardware you want on the case.

Step 5: Adjusting the Sliding Lids

Now for the fun part - getting those lids sliding smoothly.

Installation: Attach the sliding lid hardware to the case and the lids. Make sure it's secure and the lids slide effortlessly.
Adjustments: If the lids are too tight or loose, adjust the runners and guides as needed.

Pro Tips

Measure Twice, Cut Once: You don't want to end up with mismatched pieces.
Use a Level: Make sure your case is square and level. This will ensure your lids slide smoothly.
Pre-Drill Holes: This will prevent the wood from splitting when you screw in the hardware.
Don't Rush the Finish: Let the stain, varnish, or paint dry completely before moving on to the next step.
Test Before You Go: Make sure the sliding lids work properly before you permanently install all the hardware.

Optional Extras

Felt Lining: Line the inside of the case with felt to protect your firearms.
Locking Mechanism: Add a lock for added security.
Decorative Touches: Incorporate decorative elements like inlays, carvings, or metal accents to personalize your case.

Safety First

Remember, safety should always come first. Make sure your gun case is locked when not in use and store it in a safe and secure location.

Building a wooden gun case with sliding lids is a great way to combine craftsmanship and practicality. It's a rewarding project that will make your gun collection look even more impressive.

Don't be afraid to experiment and make it your own. Most importantly, enjoy the process!

Continue reading →